Adaptive sticky banner
An adaptive sticky banner is a small, automatically updated ad placed at the bottom or top of the app screen. The banner doesn't overlap the main app content and is often used in gaming apps.
The adaptive sticky banner delivers maximum performance by optimizing the ad size for each device. This ad type lets developers set a maximum allowable ad width, though the optimal ad size is still determined automatically. The height of the adaptive sticky banner shouldn't exceed 15% of the screen height.
Appearance
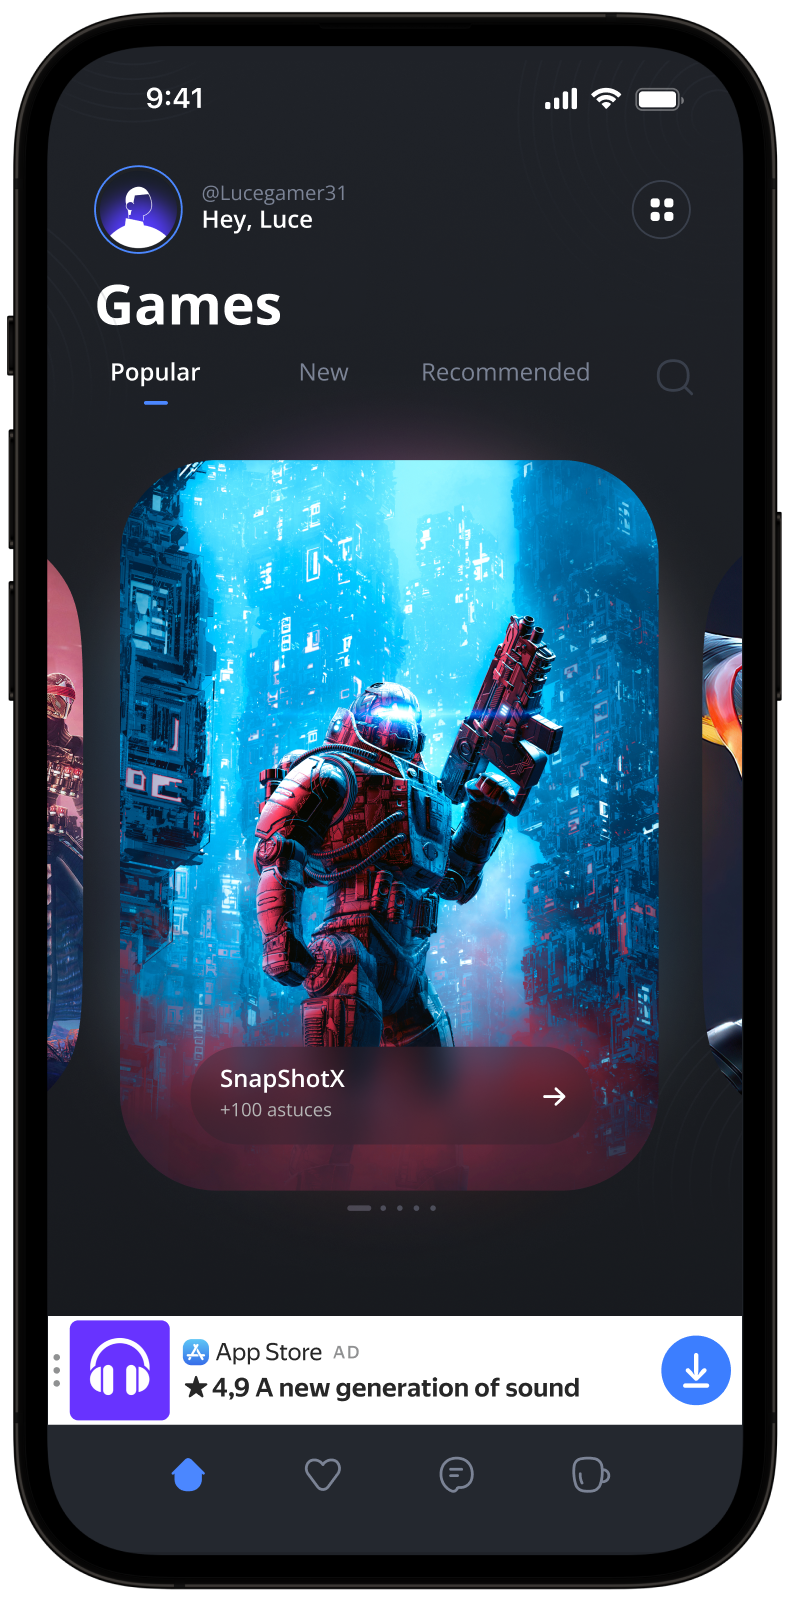
This guide shows how to integrate adaptive sticky banners into iOS apps. Besides code samples and instructions, it contains format-specific recommendations and links to additional resources.
Prerequisite
- Follow the SDK integration steps described under Quick start.
- First, you need to initialize the advertising SDK.
- Make sure you're using the latest version of the Yandex Mobile Ads SDK, and if you're using mediation, update to the most recent version of the unified build.
Implementation
Key steps to integrate an adaptive sticky banner:
- Create an AdView class instance.
- Implement the delegate methods.
- Load the ad.
- Pass additional settings if you're using Adfox.
- Receive the ad in the delegate method and render it.
Features of adaptive sticky banner integration
-
All calls to Yandex Mobile Ads SDK methods must be made from the main thread.
-
We strongly advise against attempting to load a new ad when receiving an error in the
func adViewDidFailLoading(_ adView: AdView, error: Error)delegate method. If you need to load an ad fromfunc adViewDidFailLoading(_ adView: AdView, error: Error), restrict ad load retries to avoid recurring failed ad requests due to network connection constraints. -
To make sure your adaptive sticky banners work correctly, use Auto Layout. Using a fixed-sized frame for the view may result in incorrect ad rendering.
-
Adaptive sticky banners work best when utilizing the full available width. In most cases, this will be the full width of the device screen. Be sure to consider the padding parameters set in your app and the display's safe area.
-
Adaptive sticky banners are designed for placement in scrollable content. Their height can be the same as the device screen or limited by the maximum height, depending on the API.
-
To get the ad size, use the
BannerAdSize.stickySize(withContainerWidth: CGFloat)method, passing the available ad container width as an argument. -
The
BannerAdSizeobject, which is calculated using theBannerAdSize.stickySize(withContainerWidth: CGFloat)method, contains constant ad width and height values for identical devices. When testing your app's layout on a specific device, you can be sure that the ad size for that device will remain the same. -
The height of an adaptive sticky banner never exceeds 15% of the screen height and can't be less than 50 dp.
Creating an AdView class instance
To display banner ads, create an AdView class instance, passing the ad size and ad ID to it. You also need to define a delegate for AdView, by implementing the AdViewDelegate protocol for your class.
Ads are calculated for devices using the BannerAdSize.stickySize(withContainerWidth:) SDK method. As an argument, pass the maximum permissible width of the ad container. We recommend using the entire width of the device screen or the width of the parent container. Be sure to consider the padding parameters set in your app and the display's safe area.
You will also need the ad unit ID (adUnitId) from the Boost interface.
Example of creating an AdView instance in the View Controller:
final class StickyBannerViewController: UIViewController {
        private lazy var adView: AdView = {
        let width = view.safeAreaLayoutGuide.layoutFrame.width
        let adSize = BannerAdSize.stickySize(withContainerWidth: width)

        let adView = AdView(adUnitID: "R-M-XXXXX-YY", adSize: adSize)
        adView.delegate = self
        adView.translatesAutoresizingMaskIntoConstraints = false
        return adView
    }()
}

extension StickyBannerViewController: AdViewDelegate {
    func adViewDidLoad(_ adView: AdView) {
        // Called when the ad loads successfully.
    }

    func adViewDidFailLoading(_ adView: AdView, error: Error) {
        // Called when the ad fails to load with an error.
    }
}
Loading ads
Once AdView is created, the ad needs to be loaded.
To notify when ads load or fail to load and to track the adaptive sticky banner's life cycle, you need to set delegate properties for the AdView class object and implement the AdViewDelegate protocol.
You can expand ad request parameters through AdRequest, by passing user interests, contextual page data, location, or other additional info. Adding extra context to ad requests can greatly improve ad relevance. To learn more, see Ad targeting.
The following example shows how to load an adaptive sticky banner. After successful loading, the func adViewDidLoad(_ adView: AdView) method for the AdViewDelegate delegate is called:
final class StickyBannerViewController: UIViewController {
    private lazy var adView: AdView = {
        let width = view.safeAreaLayoutGuide.layoutFrame.width
        let adSize = BannerAdSize.stickySize(withContainerWidth: width)

        let adView = AdView(adUnitID: "R-M-XXXXX-YY", adSize: adSize)
        adView.delegate = self
        adView.translatesAutoresizingMaskIntoConstraints = false
        return adView
    }()

    func loadAd() {
        adView.loadAd()
    }
}
Ad display
After successfully loading the ad, you need to render it. There are two ways to do that:
Take the adView you got from the delegate method and add it to your container. Then add autolayout constraints so the banner is displayed where you want it.
final class StickyBannerViewController: UIViewController {
  private lazy var adView: AdView ={
      let width = view.safeAreaLayoutGuide.layoutFrame.width
      let adSize = BannerAdSize.stickySize(withContainerWidth: width)

      let adView = AdView(adUnitID: "R-M-XXXXX-YY", adSize: adSize)
      adView.delegate = self
      adView.translatesAutoresizingMaskIntoConstraints = false
      return adView
  }()

  func showAd(){
      view.addSubview(adView)
      NSLayoutConstraint.activate([
          adView.topAnchor.constraint(equalTo: loadButton.bottomAnchor, constant: 100),
          adView.centerXAnchor.constraint(equalTo: view.centerXAnchor)
      ])
  }
}
The banners will be added on top of all the controller's views, centered horizontally, and placed at the top or bottom of the container, respectively.
final class StickyBannerViewController: UIViewController {
  private lazy var adView: AdView ={
      let width = view.safeAreaLayoutGuide.layoutFrame.width
      let adSize = BannerAdSize.stickySize(withContainerWidth: width)

      let adView = AdView(adUnitID: "R-M-XXXXX-YY", adSize: adSize)
      adView.delegate = self
      adView.translatesAutoresizingMaskIntoConstraints = false
      return adView
  }()

  func showAd(){
      adView.displayAdBottom(in: view)
  }
}
Testing adaptive sticky banner integration
Using demo ad units for ad testing
We recommend using test ads to test your ad integration and your app itself.
To make sure that test ads are returned for each ad request, we created a special demo ad placement ID designed to help you test your ad integration.
Demo adUnitId: demo-banner-yandex.
Warning
Before publishing your app in the store, make sure to replace the demo placement ID with the real ID you obtained in the interface Boost.
For the list of all available demo ad placement IDs, see Demo ad units for testing.
Testing ad integration
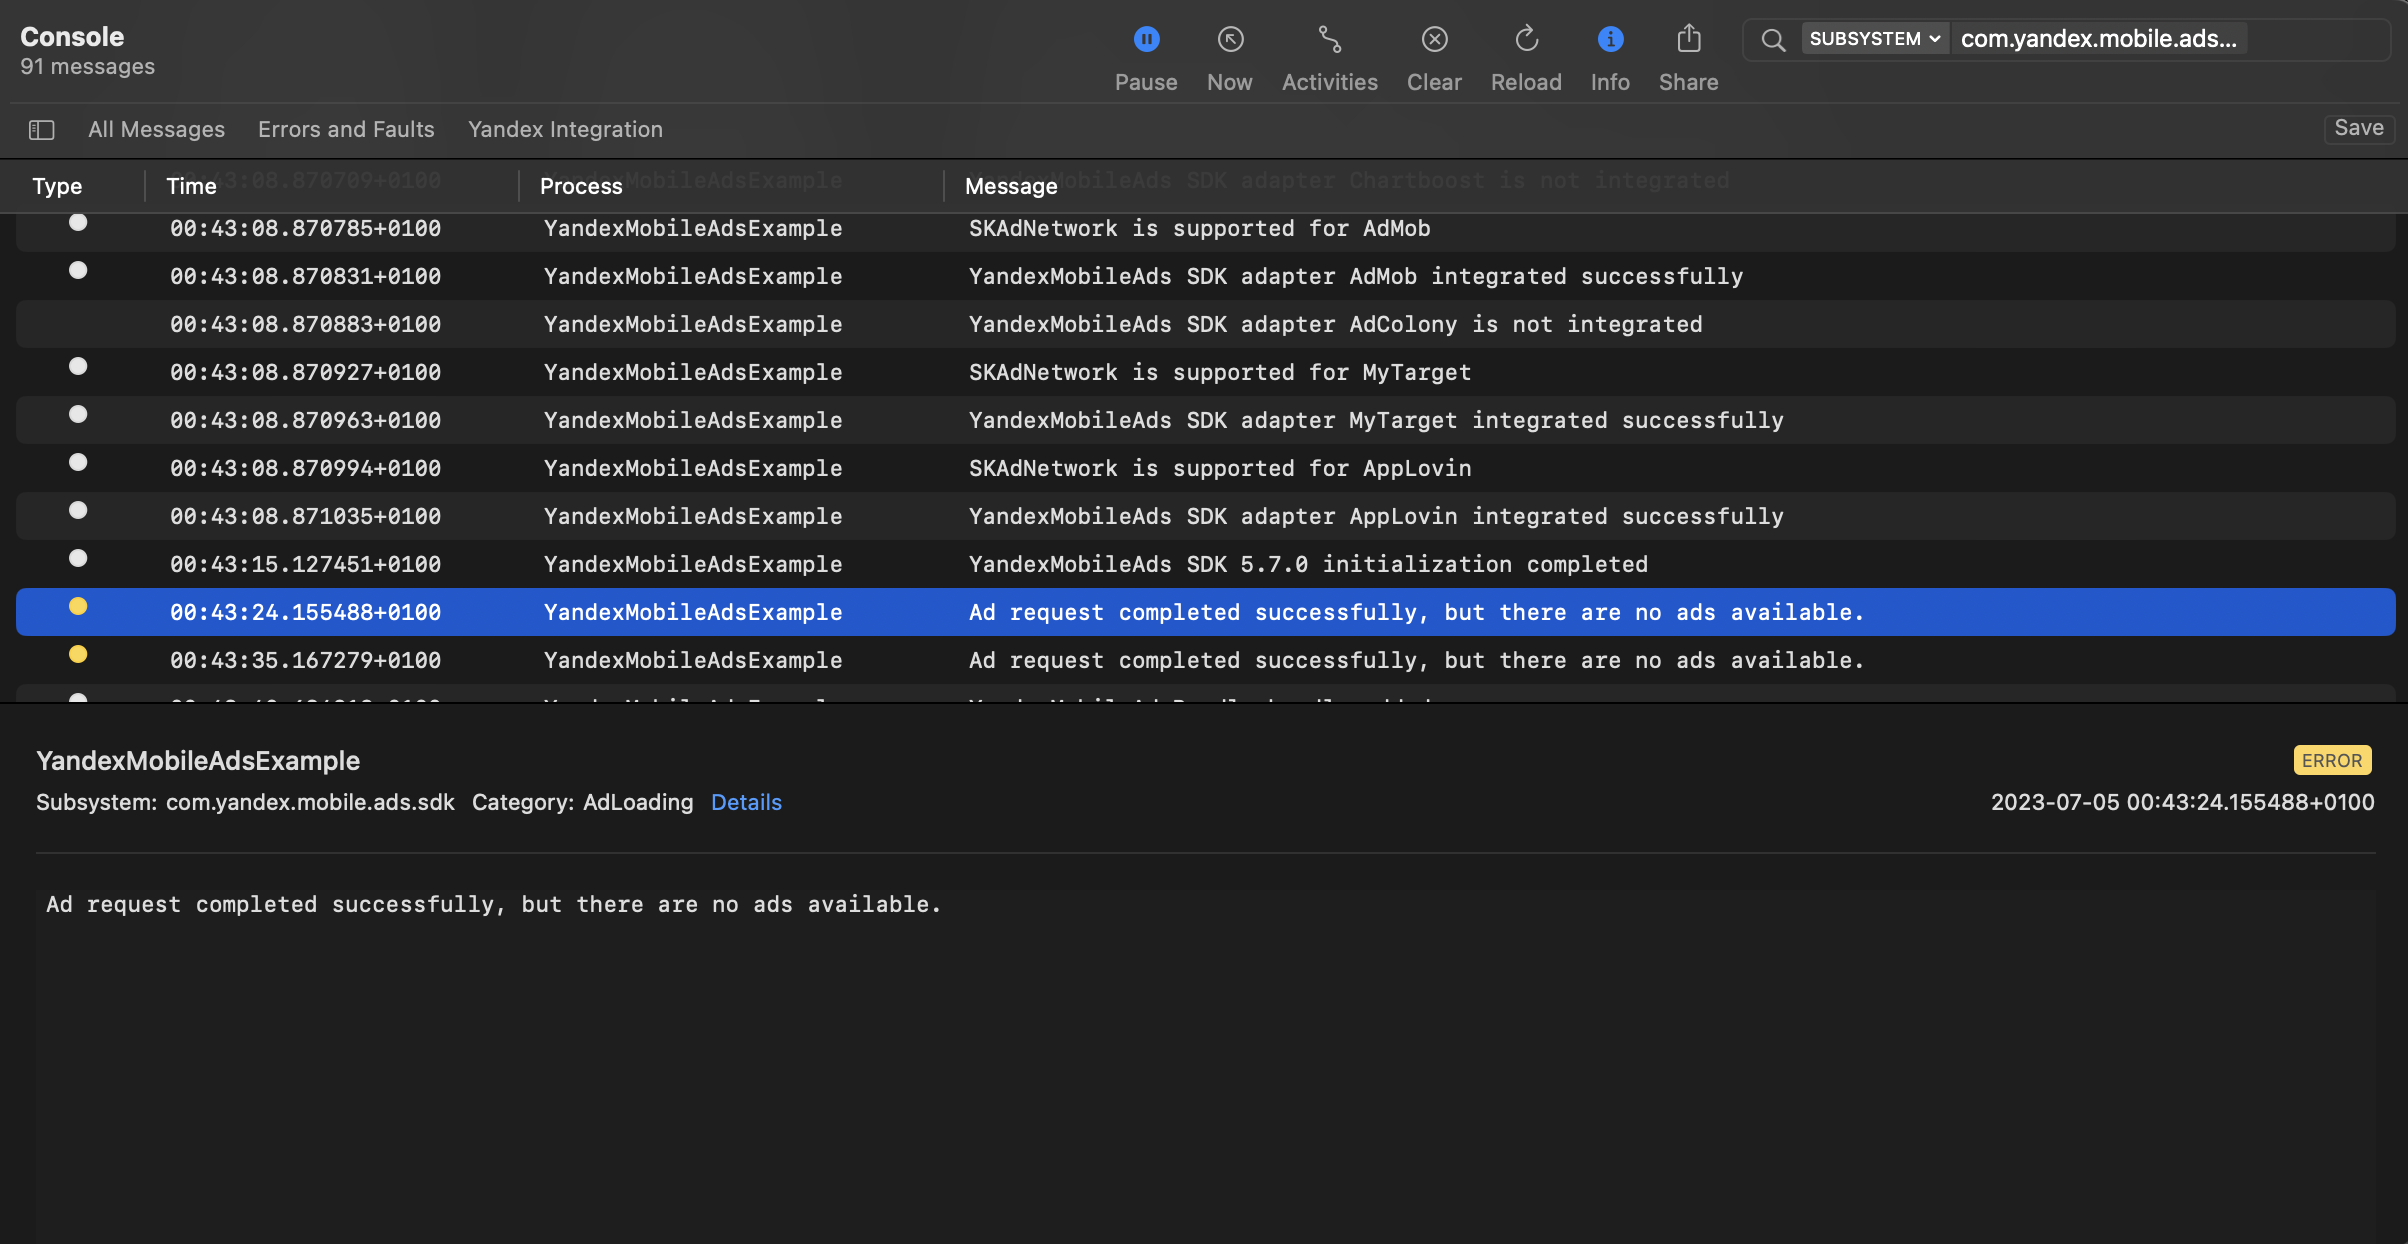
You can test your ad integration using the native Console tool.
To view detailed logs, call the MobileAds class's enableLogging method.
MobileAds.enableLogging()
To view SDK logs, go to the Console tool and set Subsystem = com.mobile.ads.ads.sdk. You can also filter logs by category and error level.
If you're having problems integrating ads, you'll get a detailed report on the issues and recommendations for how to fix them.
Additional resources
- Link to GitHub.