Google AdMob mediation
Note
Follow this guide if you're already using Google AdMob mediation and want to add Boost as a custom event.
If you want to manage external ad networks through the Boost interface, use Yandex Mobile Mediation.
You can connect to the Boost via Google AdMob mediation. To add the Boost to Google AdMob mediation, follow these steps:
- Integrate Google AdMob mediation.
- Connect the adapter for the Yandex Mobile Ads SDK.
- Create an AdUnitId for your selected ad type in the Boost interface.
- Add the Boost in the Google AdMob web interface.
- Sync the ad unit settings between the two web interfaces.
Connecting an adapter for the Yandex Mobile Ads SDK
To integrate the Boost with Google AdMob mediation, add the adapter dependency to the build.gradle file of your project's module:
dependencies {
    ...
    implementation 'com.yandex.ads.adapter:admob-mobileads:8.0.0.0'
}
To manually transmit GDPR (user consent) and COPPA (age-restricted user) values from the app code to the Yandex Mobile Ads SDK, make sure to also enable the Yandex Mobile Ads SDK. Add the following to the dependencies block:
implementation "com.yandex.android:mobileads:8.6.0.0"
Adding the Boost in the Google AdMob mediation web interface
For each ad placement (AdMob AdUnitId) in Google AdMob mediation, create a corresponding ad unit (Ad Unit ID) in the Boost interface.
Next, add the Boost in the Google AdMob mediation web interface:
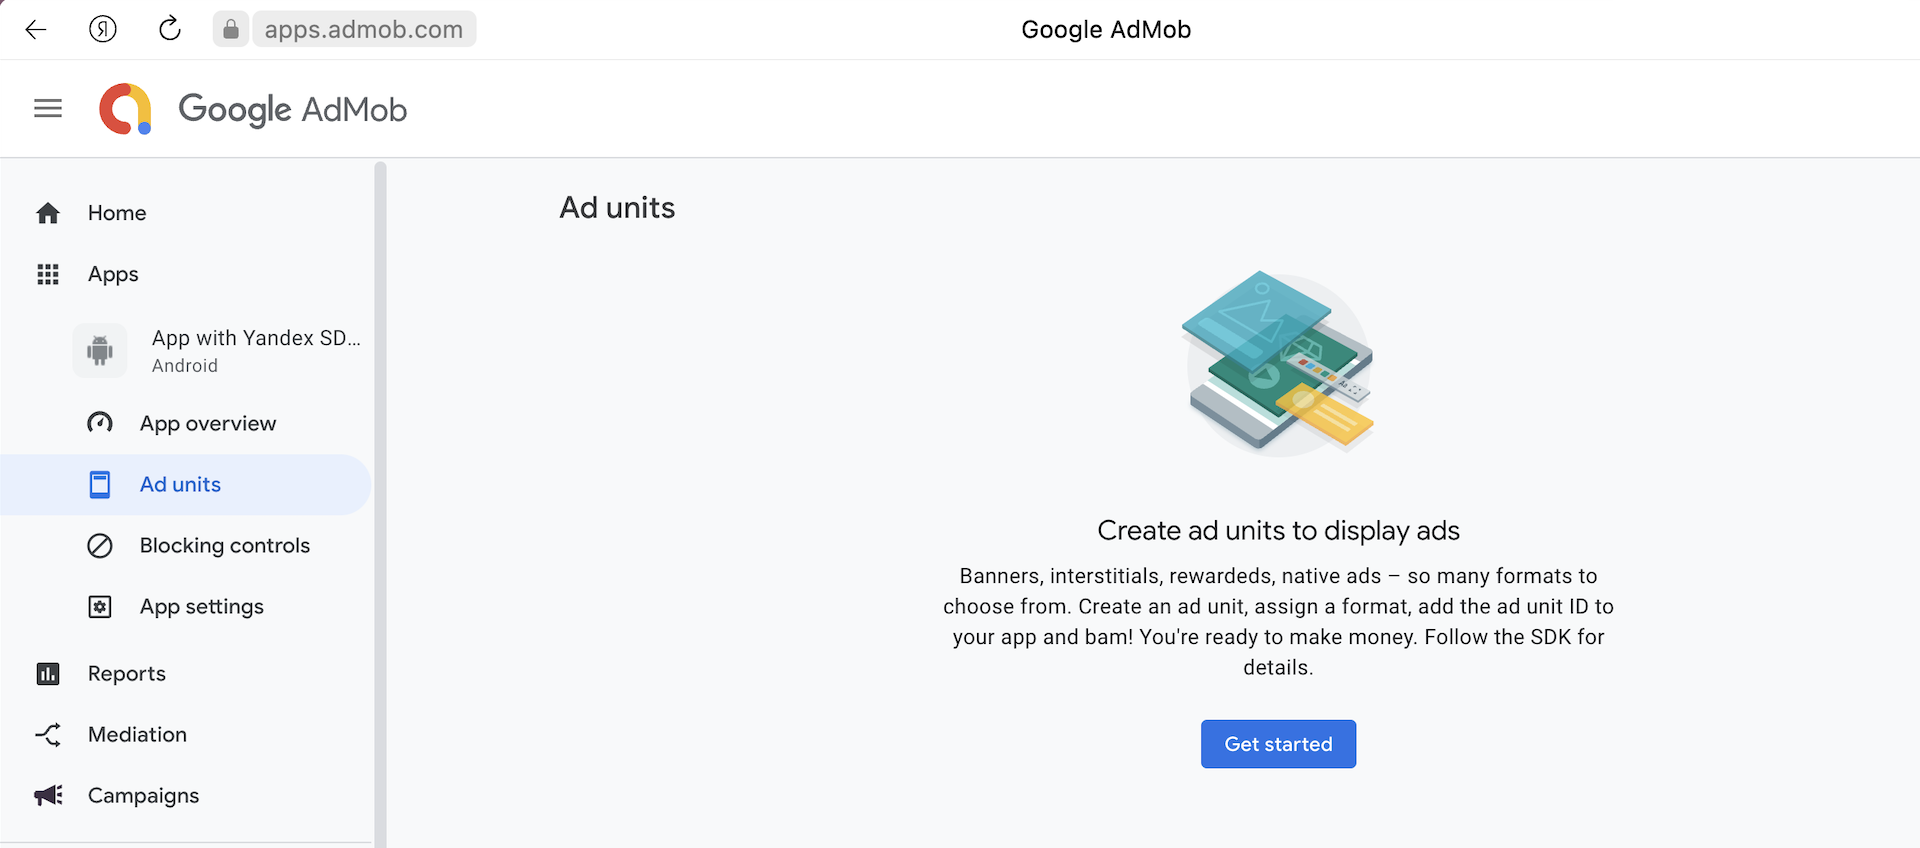
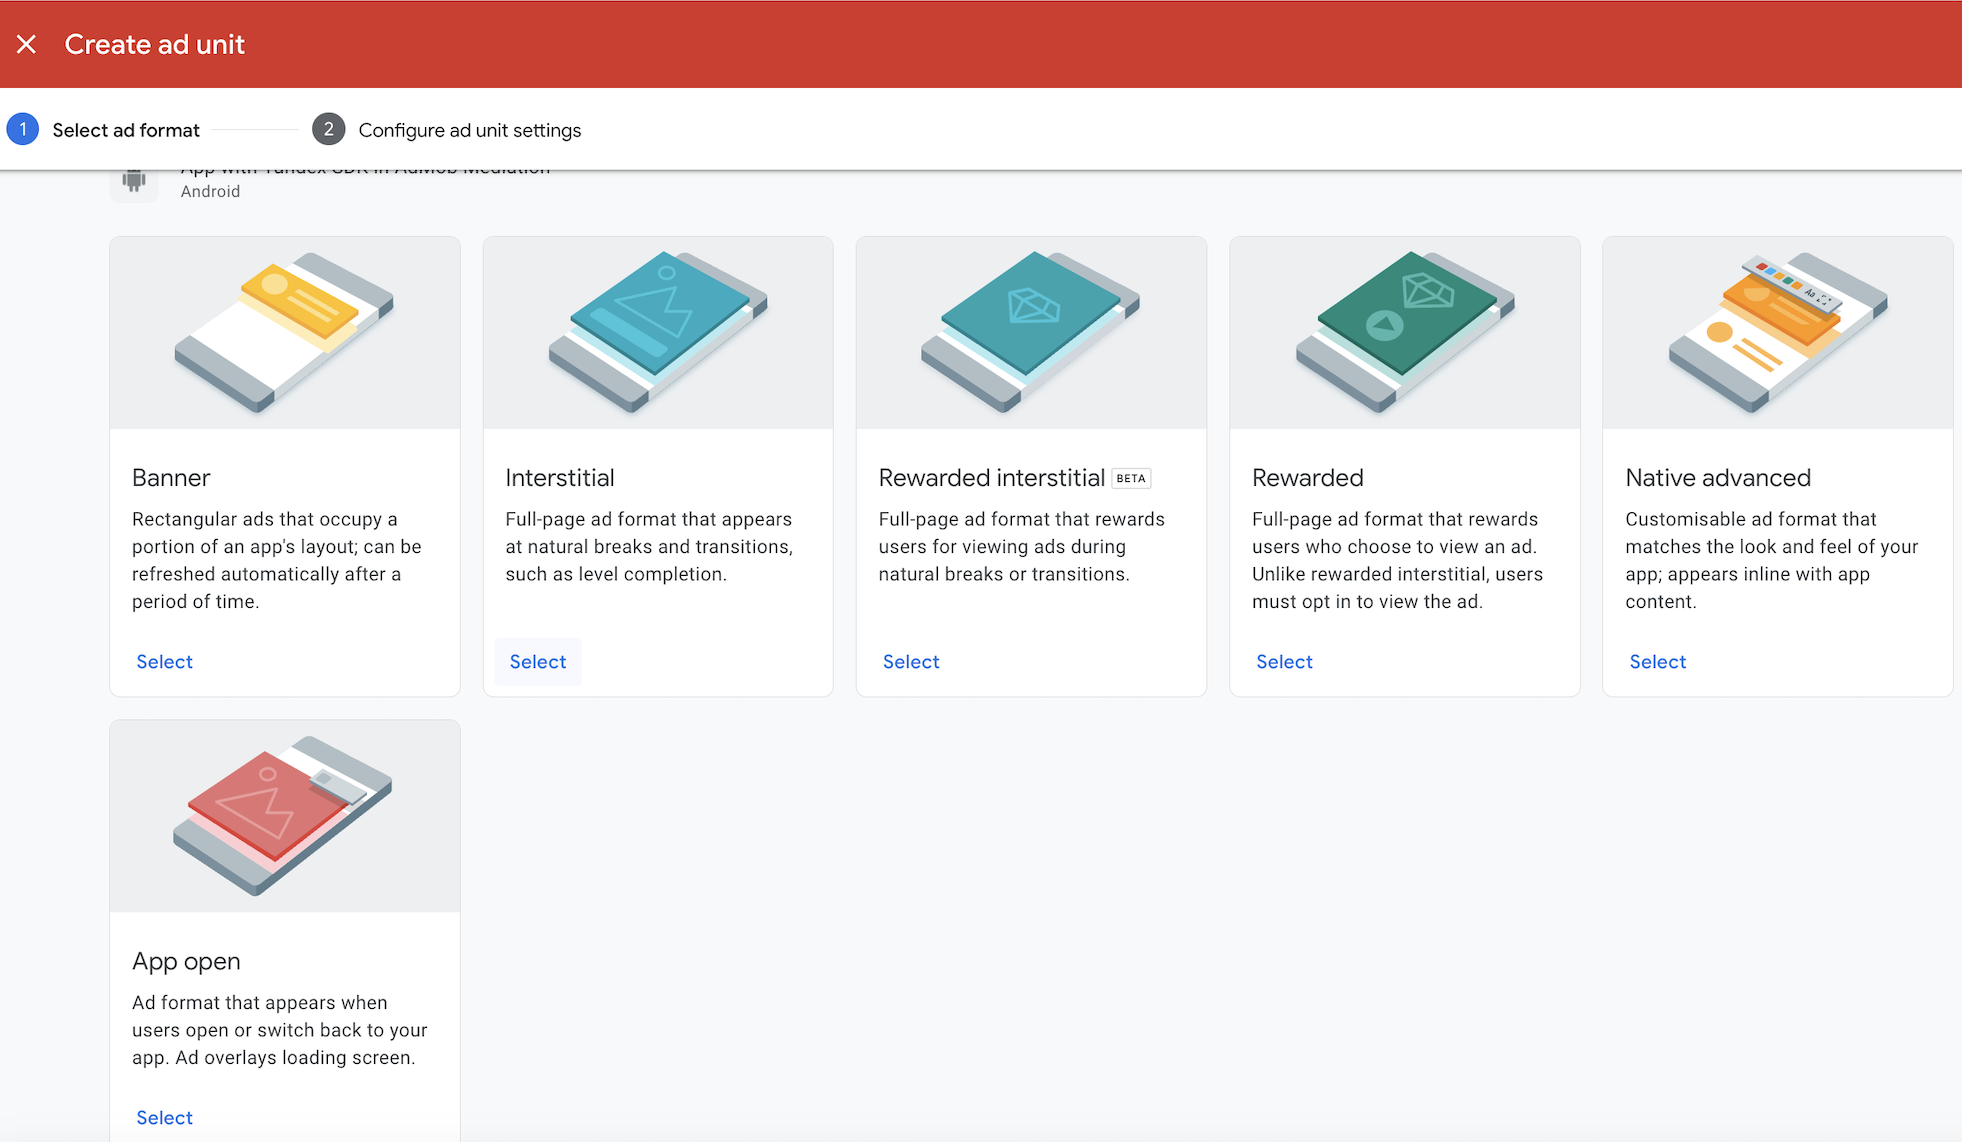
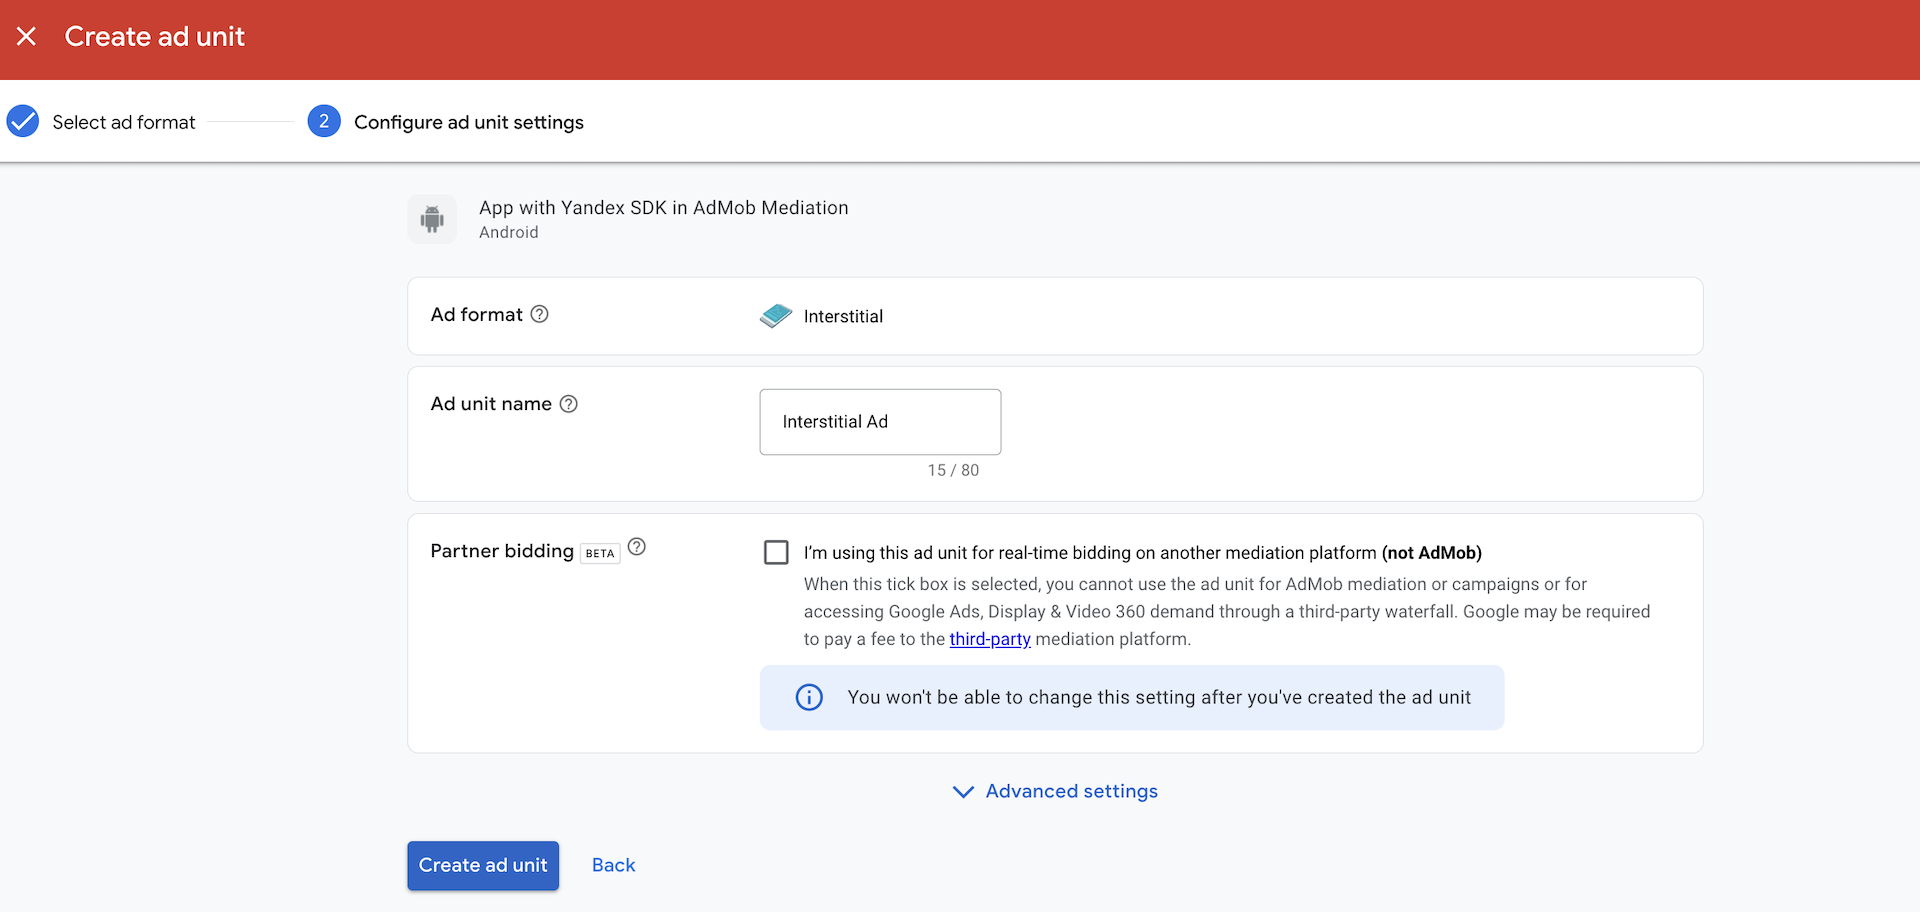
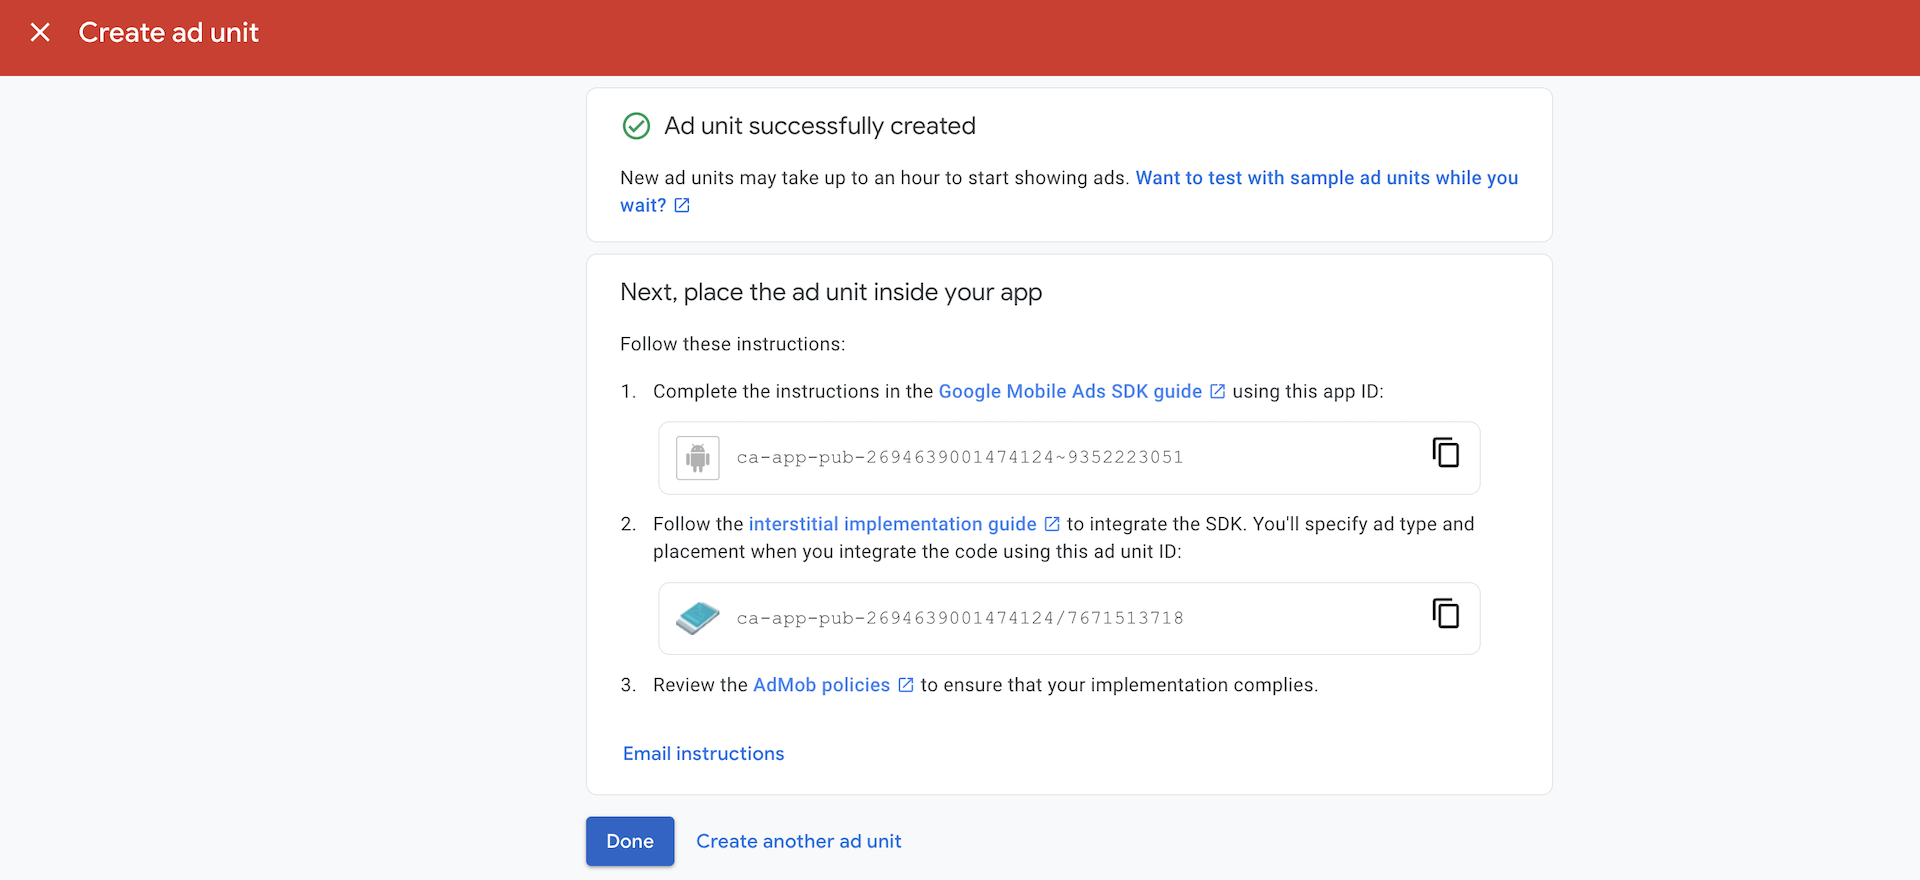
1. Create a Google AdMob ad unit
- Go to your app section.
- Create an ad unit for the selected ad format and configure the ad placement parameters (for example, its name).
- After creating the ad unit, save its ID.
Screenshots from the Google AdMob interface
2. Create a Yandex ad unit
Guide for creating an ad unit in the Boost interface.
3. Set up Google AdMob mediation
-
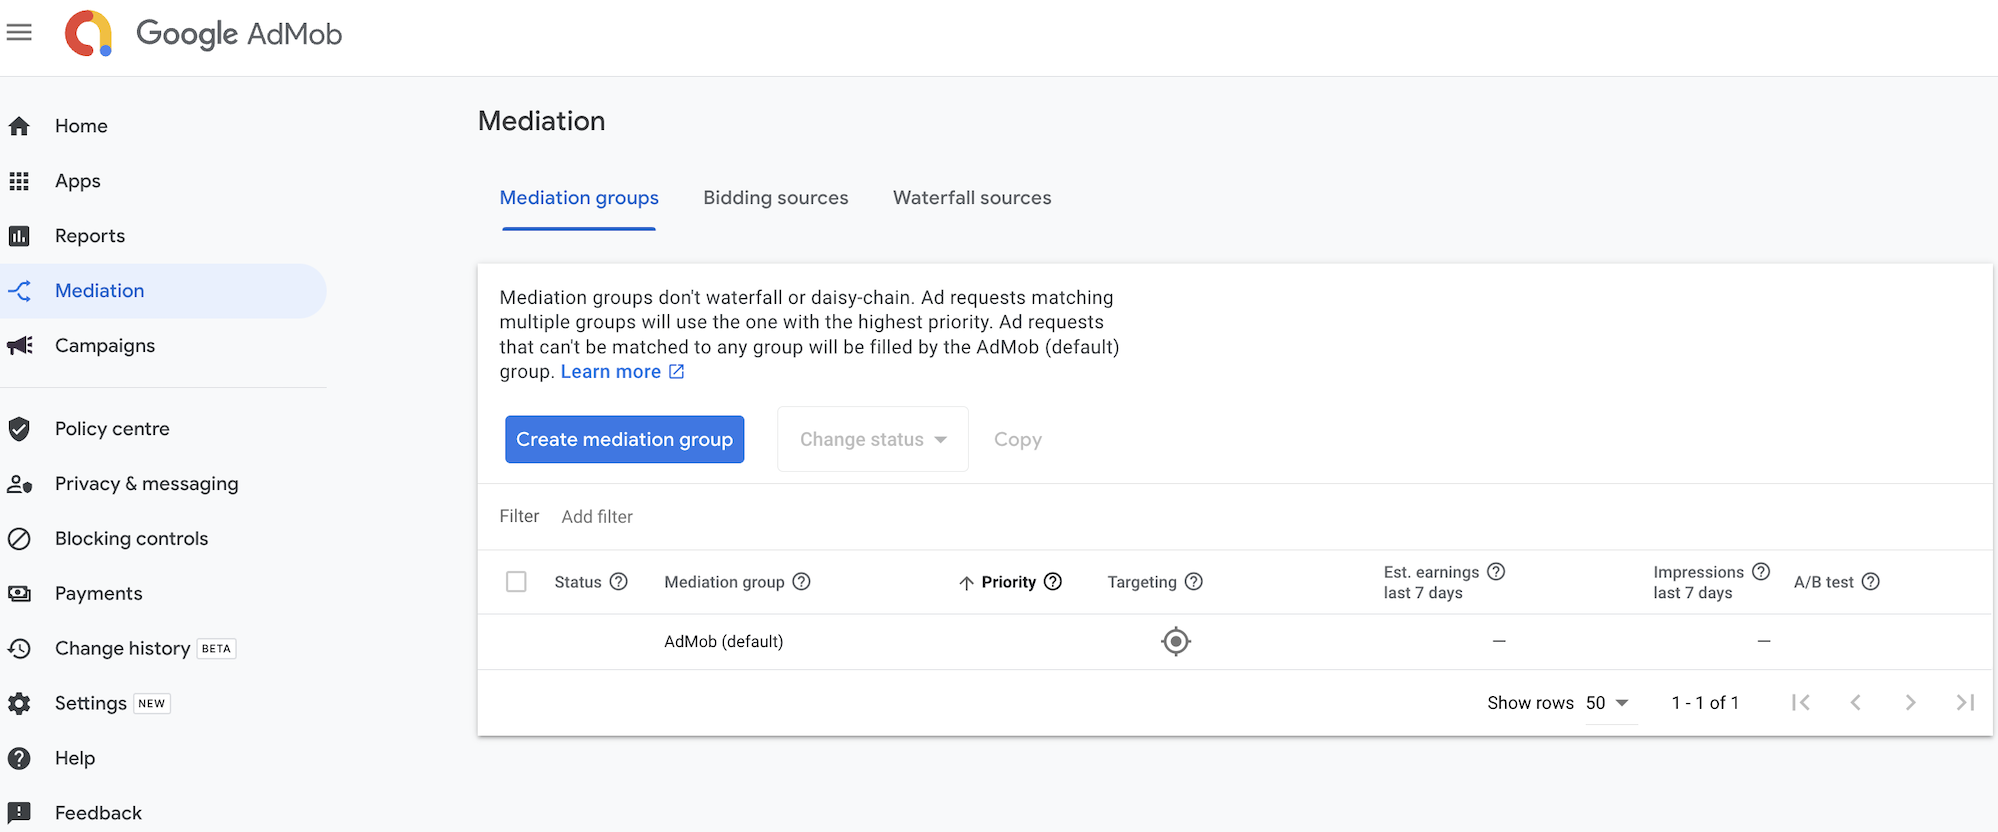
In the Google AdMob web interface, go to Mediation → Mediation groups and click Create mediation group.
-
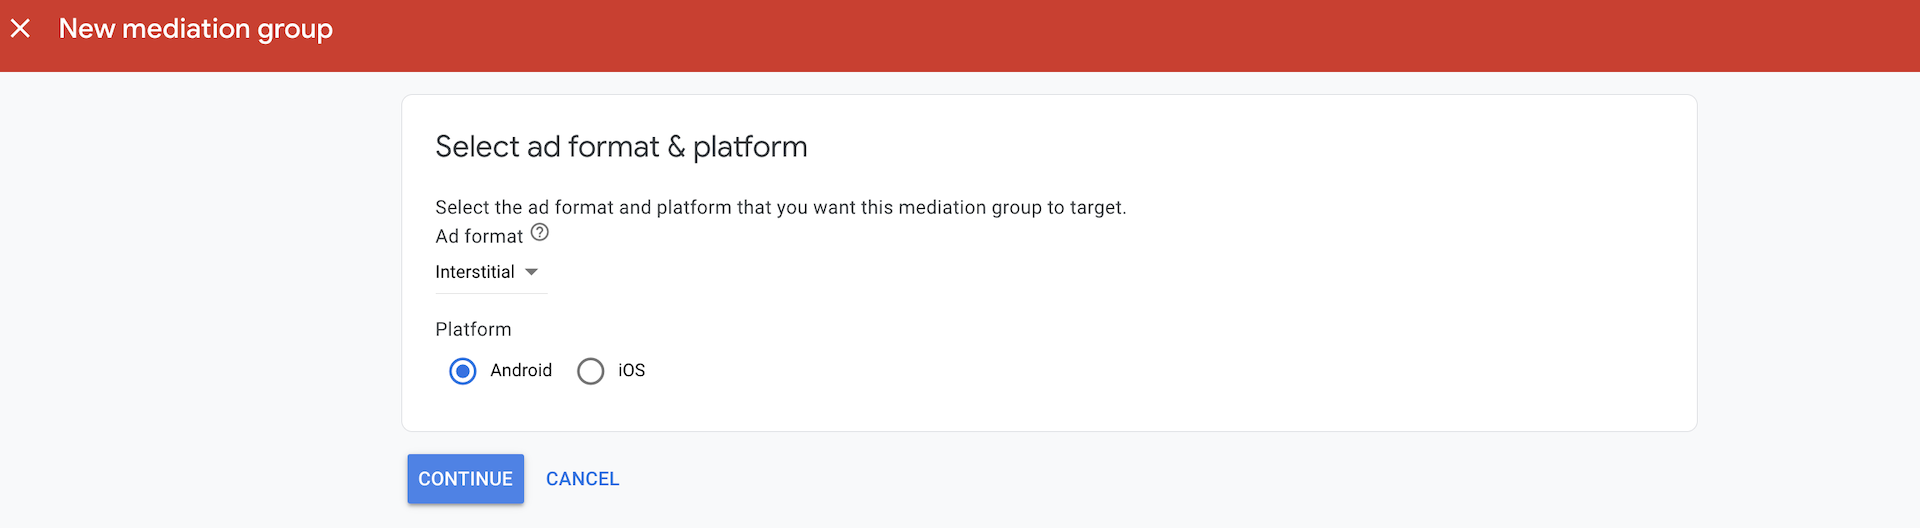
Select a platform.
-
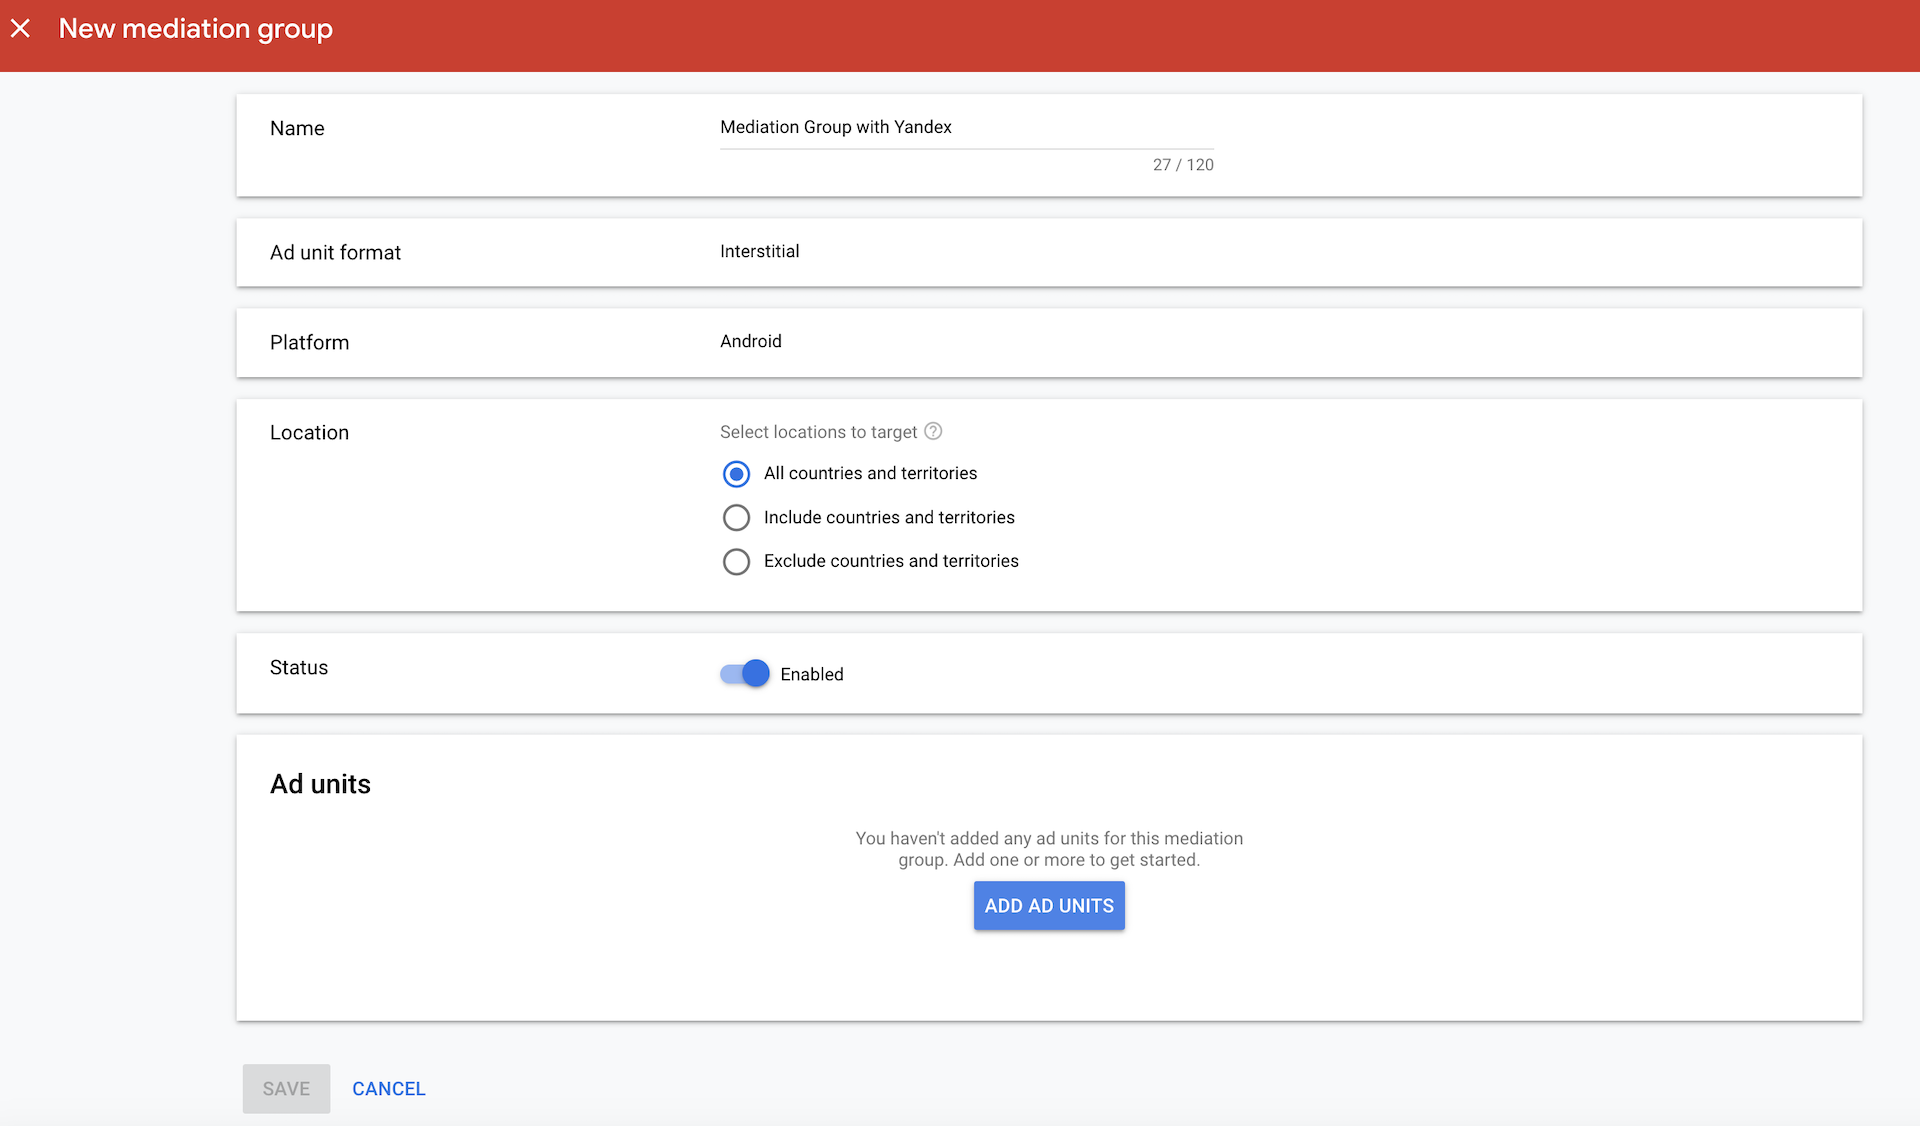
Set the mediation group parameters, such as name and region, then proceed to adding the ad placement.
-
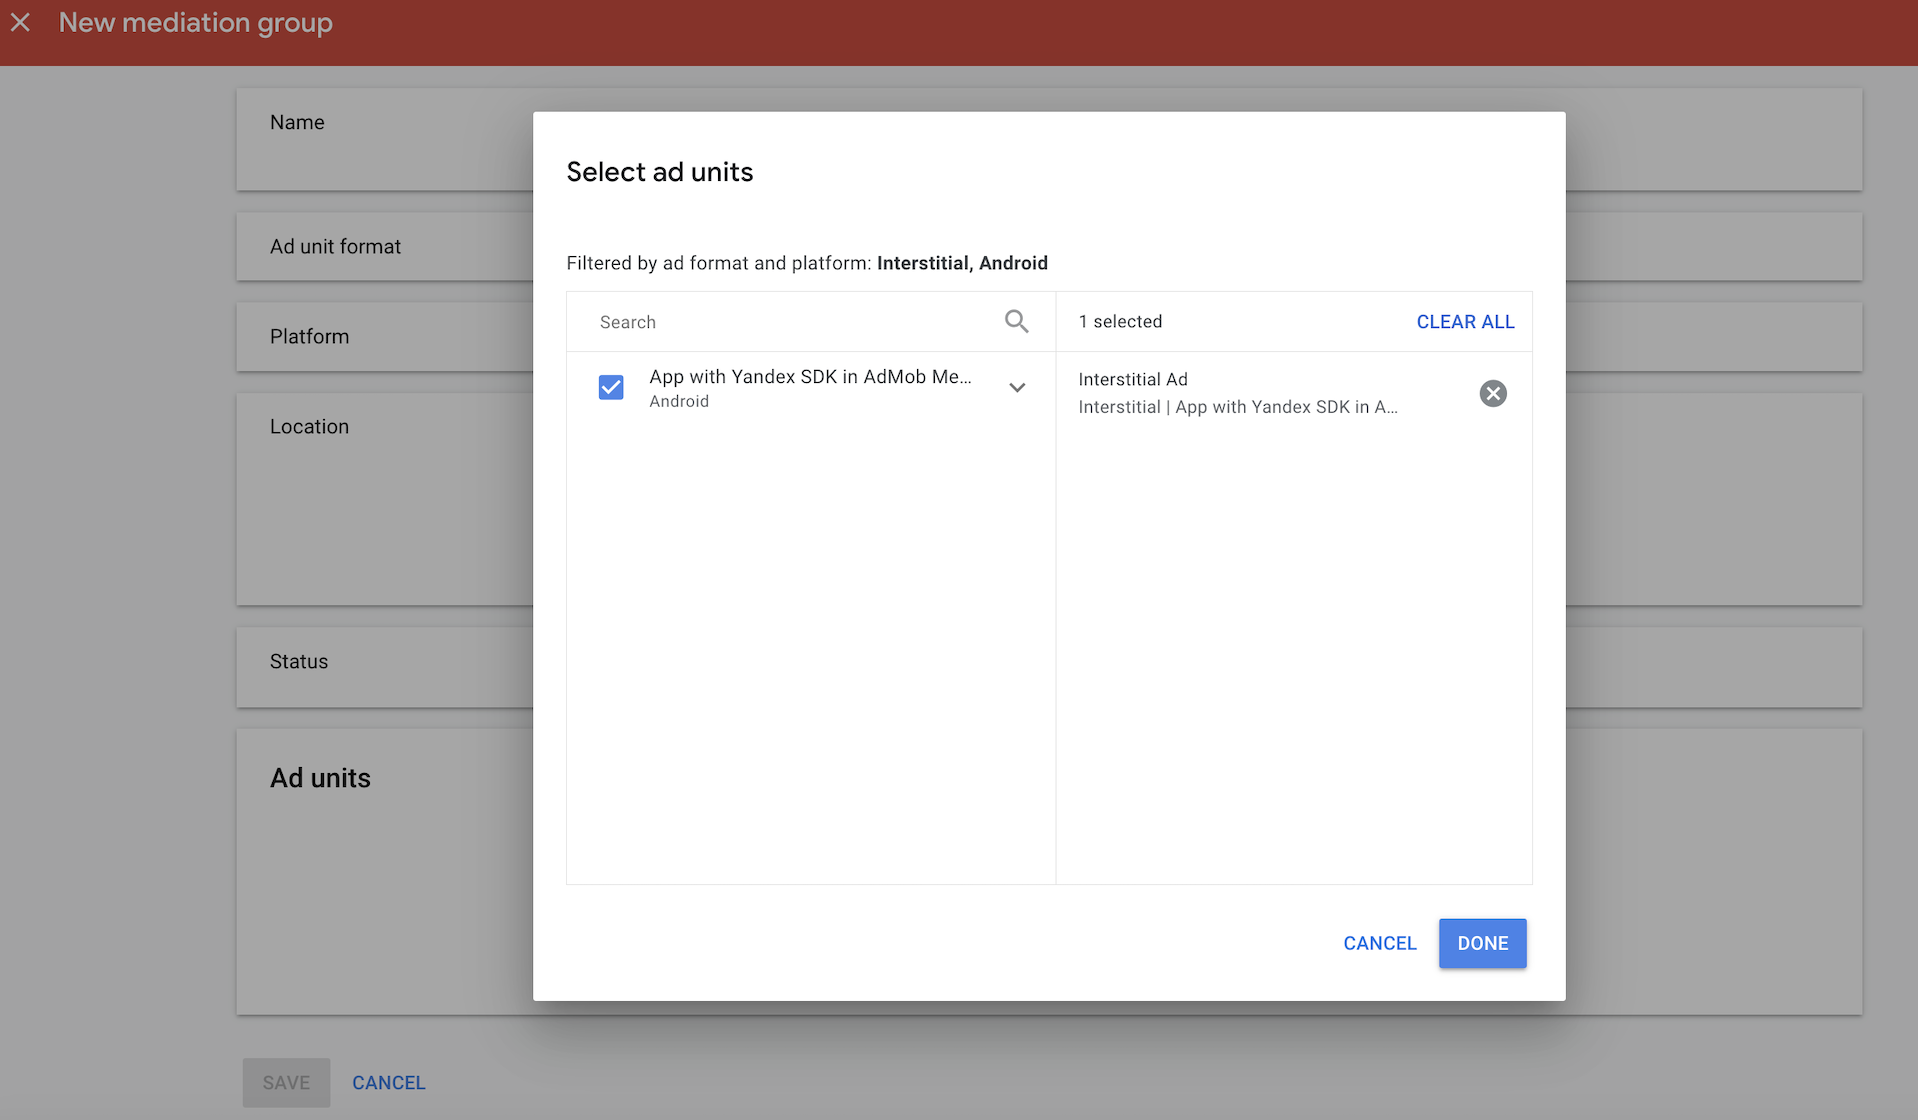
Select your app, select the ad unit you created, and add it. The ad unit you added should appear in the Ad Units section.
-
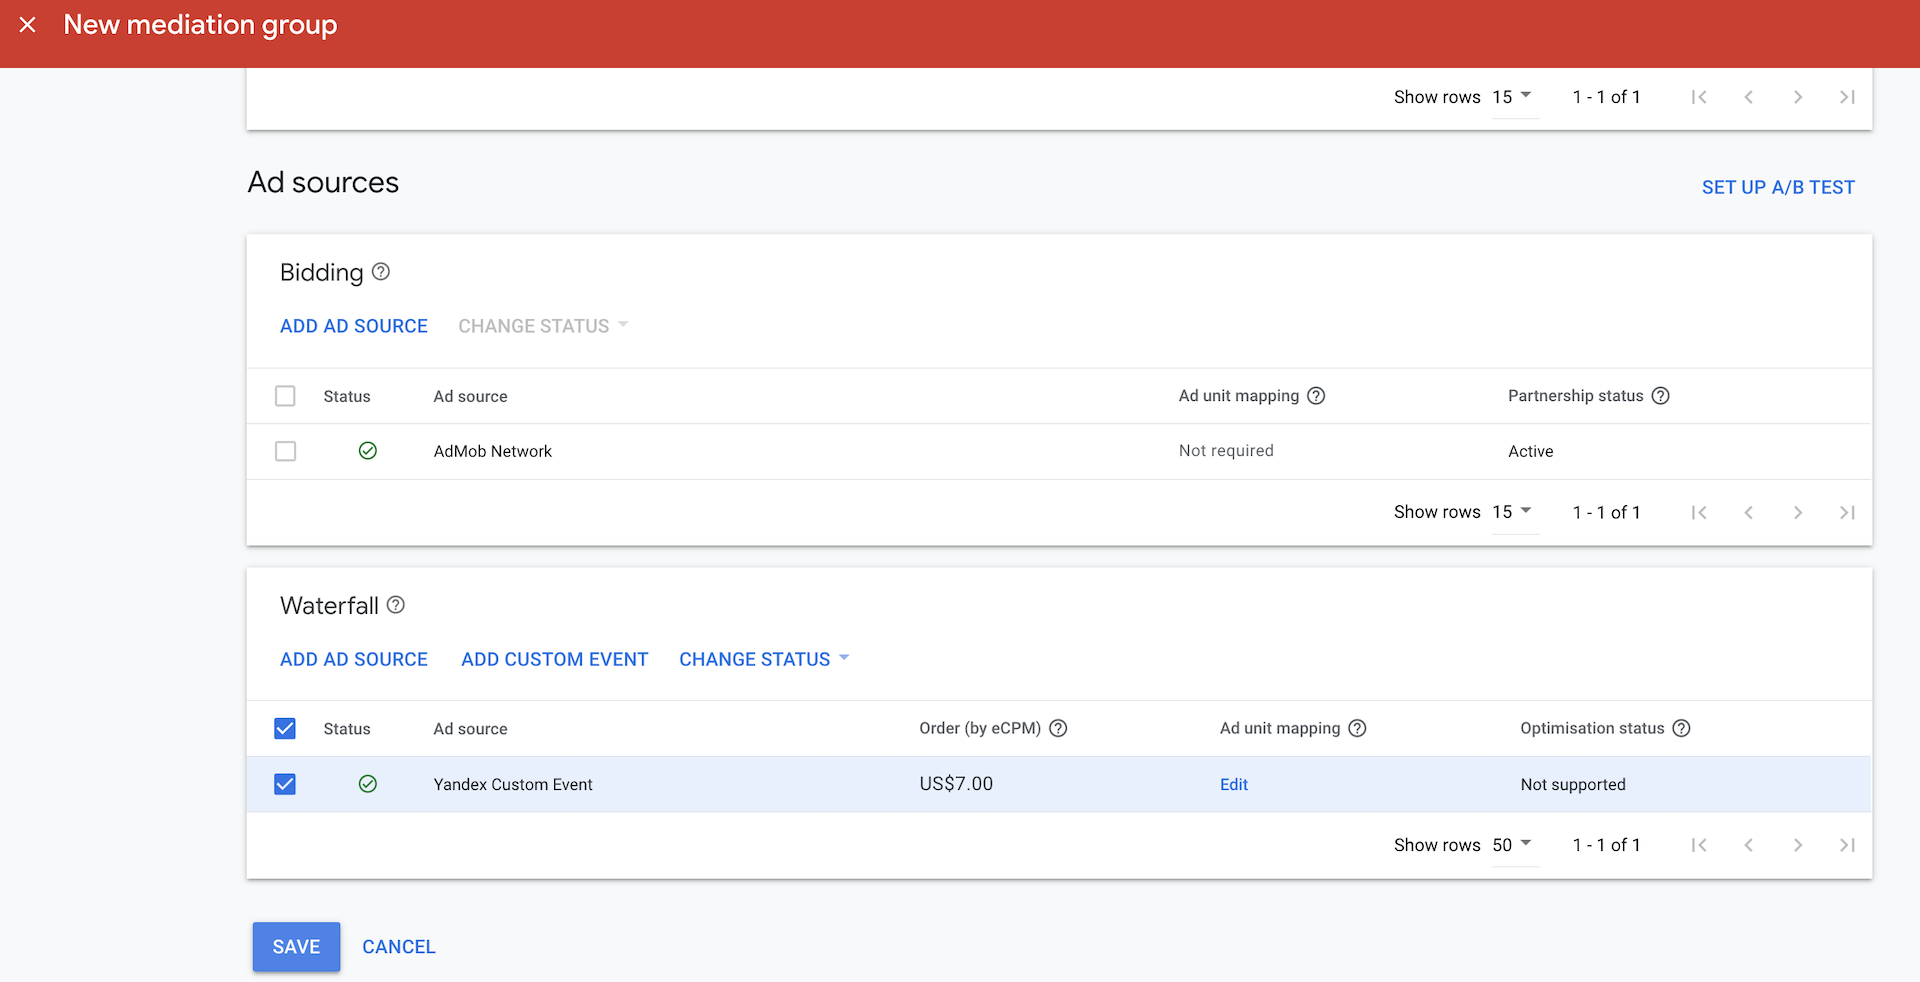
The Boost can be added to Google AdMob mediation only as a custom event. Click Add Custom Event to add a custom event. Set up your custom event for each adUnitId created in the Boost interface.
-
Configure a custom event for accessing the Boost by setting the event name and eCPM floor.
Warning
The eCPM floor currency and value must match the floor you set for the ad placement in the Boost interface.
If you selected the Maximum revenue strategy for the ad placement in the Boost interface without a set floor, enter the expected or historical eCPM in AdMob. AdMob uses this value to position the custom event in the waterfall.
-
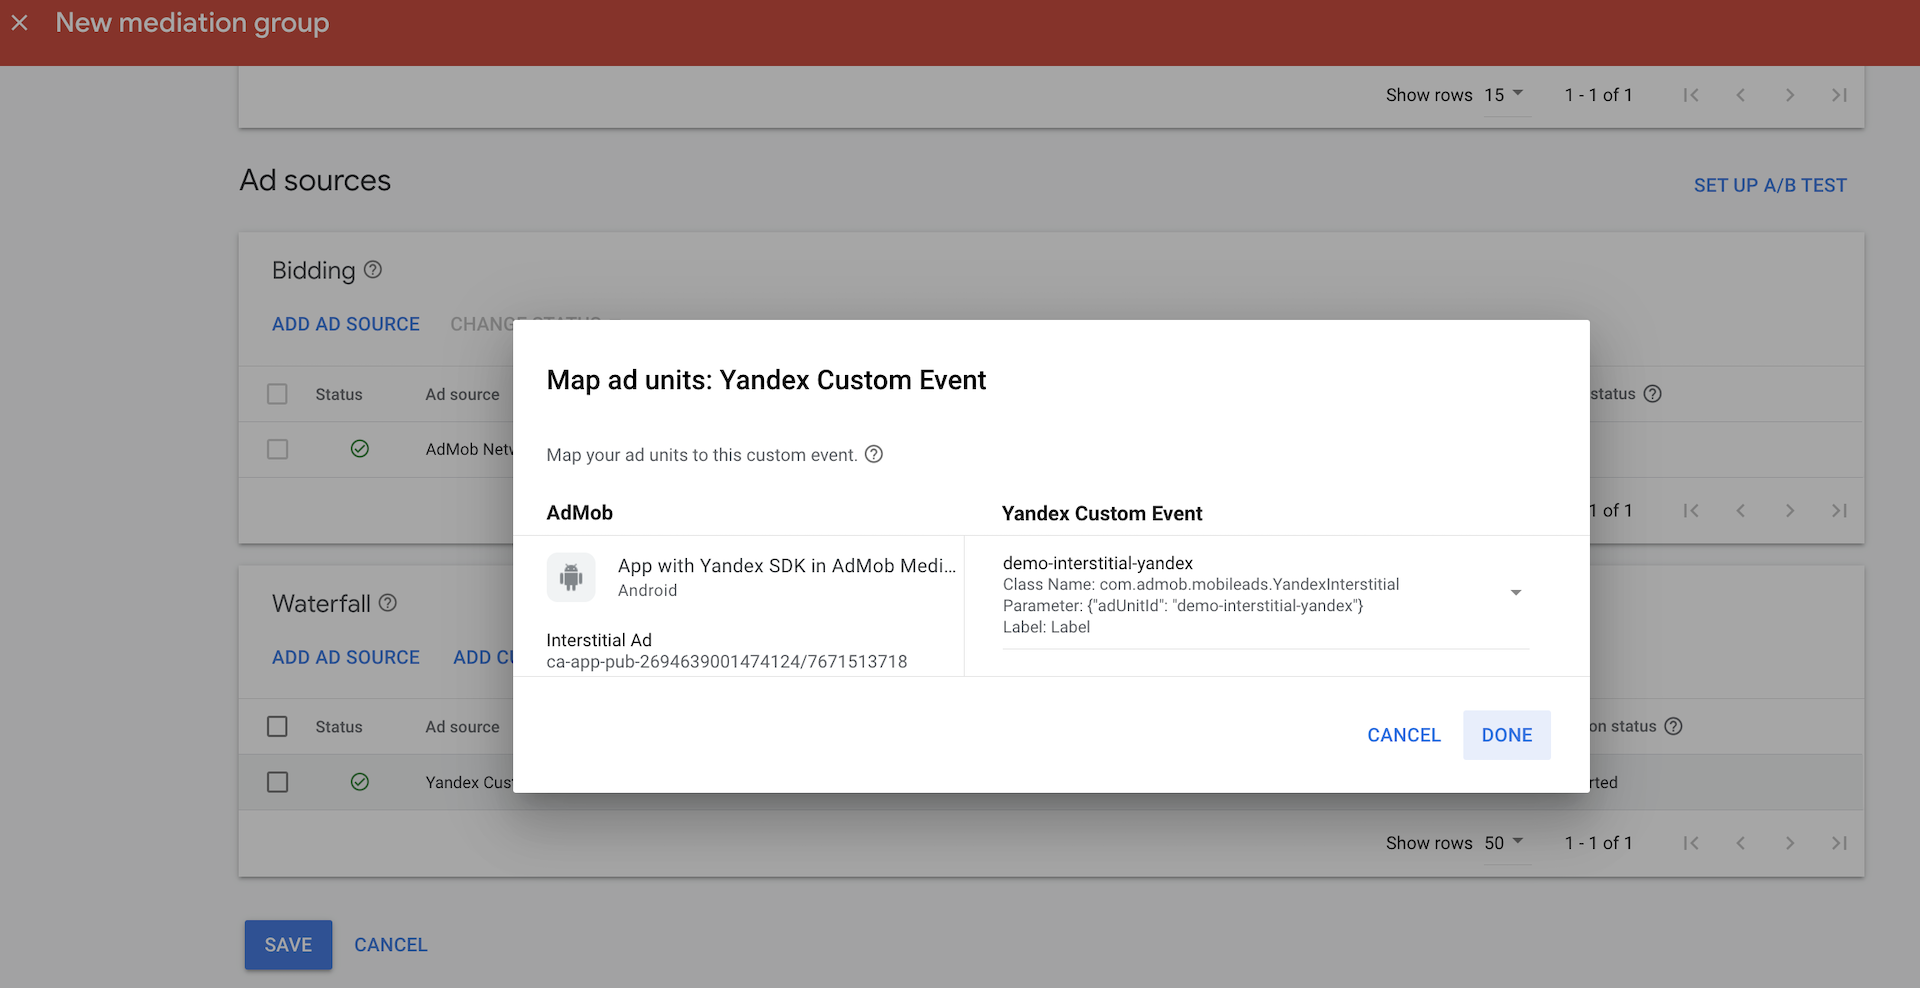
Set up mapping of the custom event to the Boost adapter:
- Set the mapping name.
- Set an adapter class name that corresponds to your selected ad format.
- Set the event parameters.
Each ad format has a corresponding Boost adapter class:
com.admob.mobileads.YandexBannerfor banner ads.com.admob.mobileads.YandexInterstitialfor interstitial ads.com.admob.mobileads.YandexRewardedfor rewarded ads.com.admob.mobileads.YandexNativefor native ads.
In the Parameter field, configure the custom event settings in JSON format. Make sure to set the Ad Unit ID for your selected ad placement:
{"adUnitId": "R-M-XXXXXX-X"}.Warning
The Boost adapter class name and the
adUnitIdJSON key are case-sensitive. Make sure you spell them correctly, otherwise ads might not load from the custom event.For native ads, when connecting to the Boost via Google AdMob, you must provide the
store/storeView, which is needed to pass the requireddomainasset. If thestoreViewisn't registered or displayed, the impression may not be counted. For compact layouts, you can use a separate, single-lineTextViewwithout a signature, registered as thestoreView. -
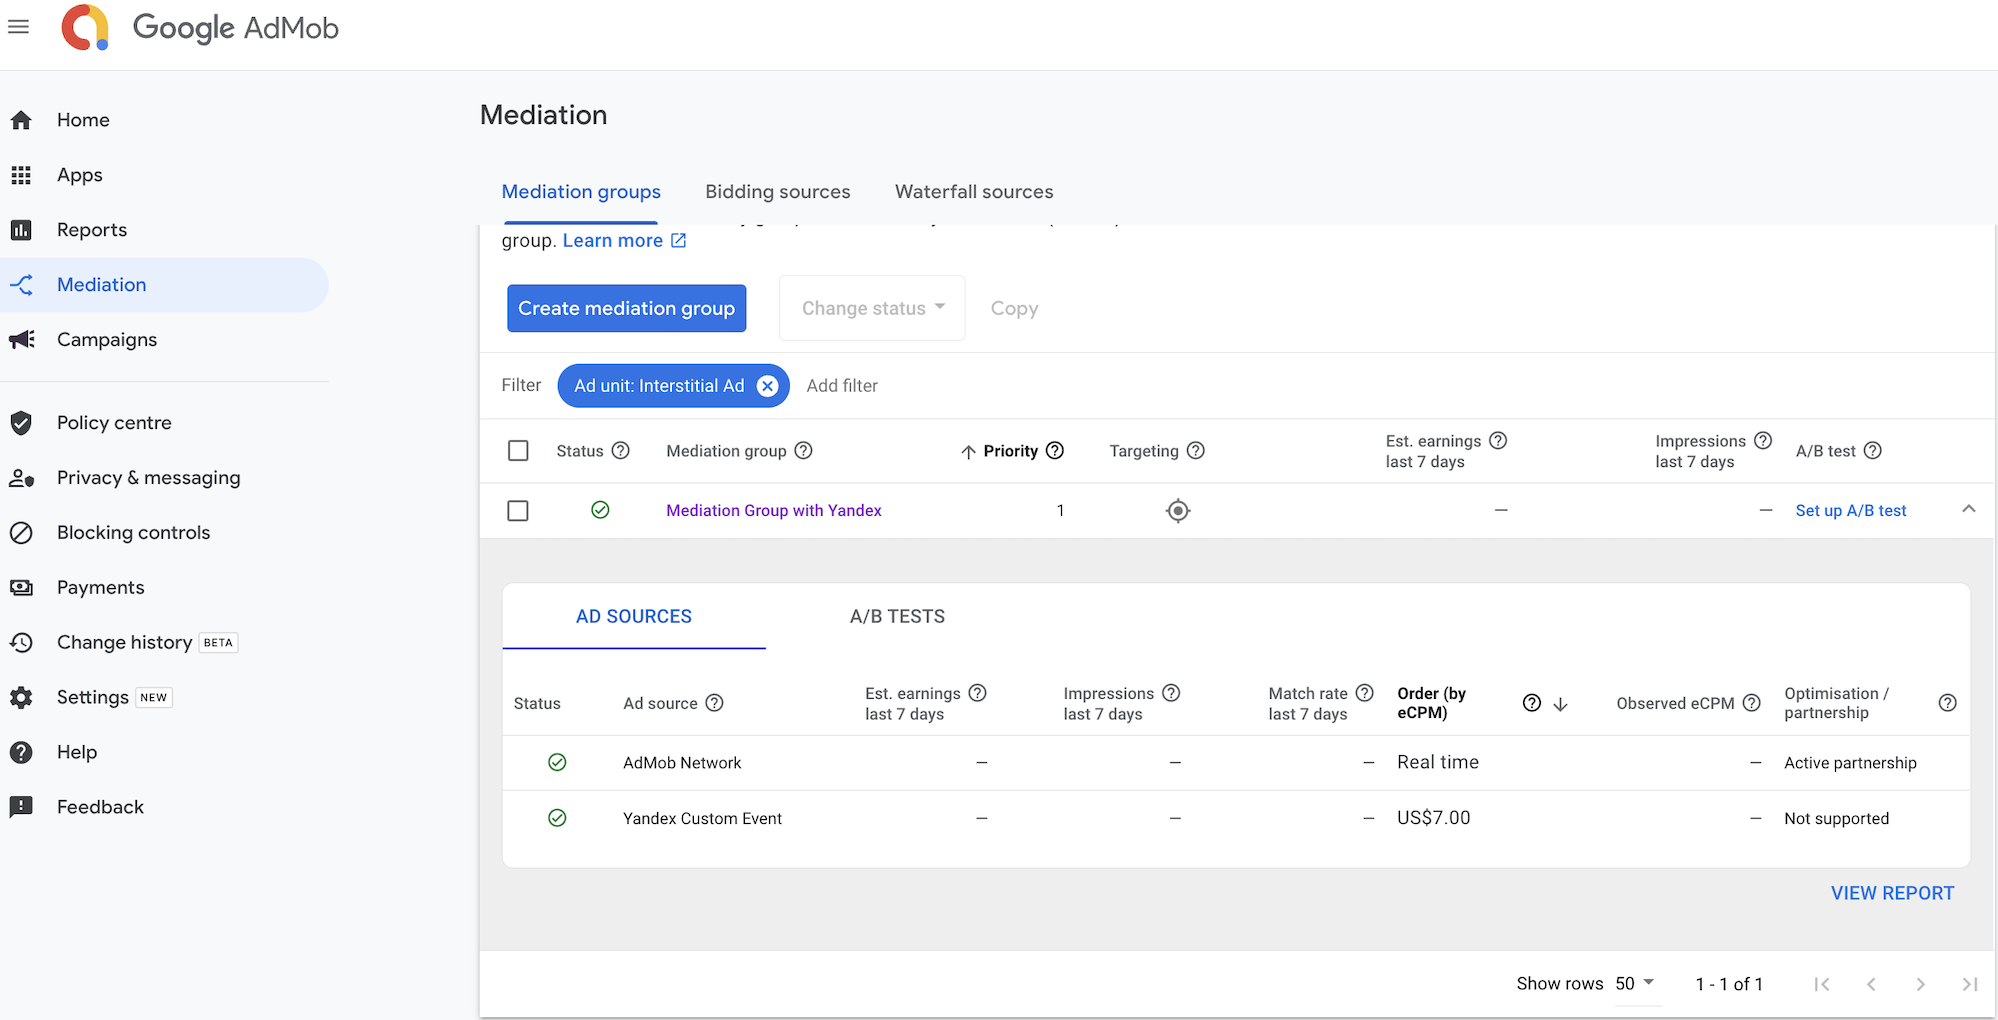
Save the changes.
Screenshots from the Google AdMob interface
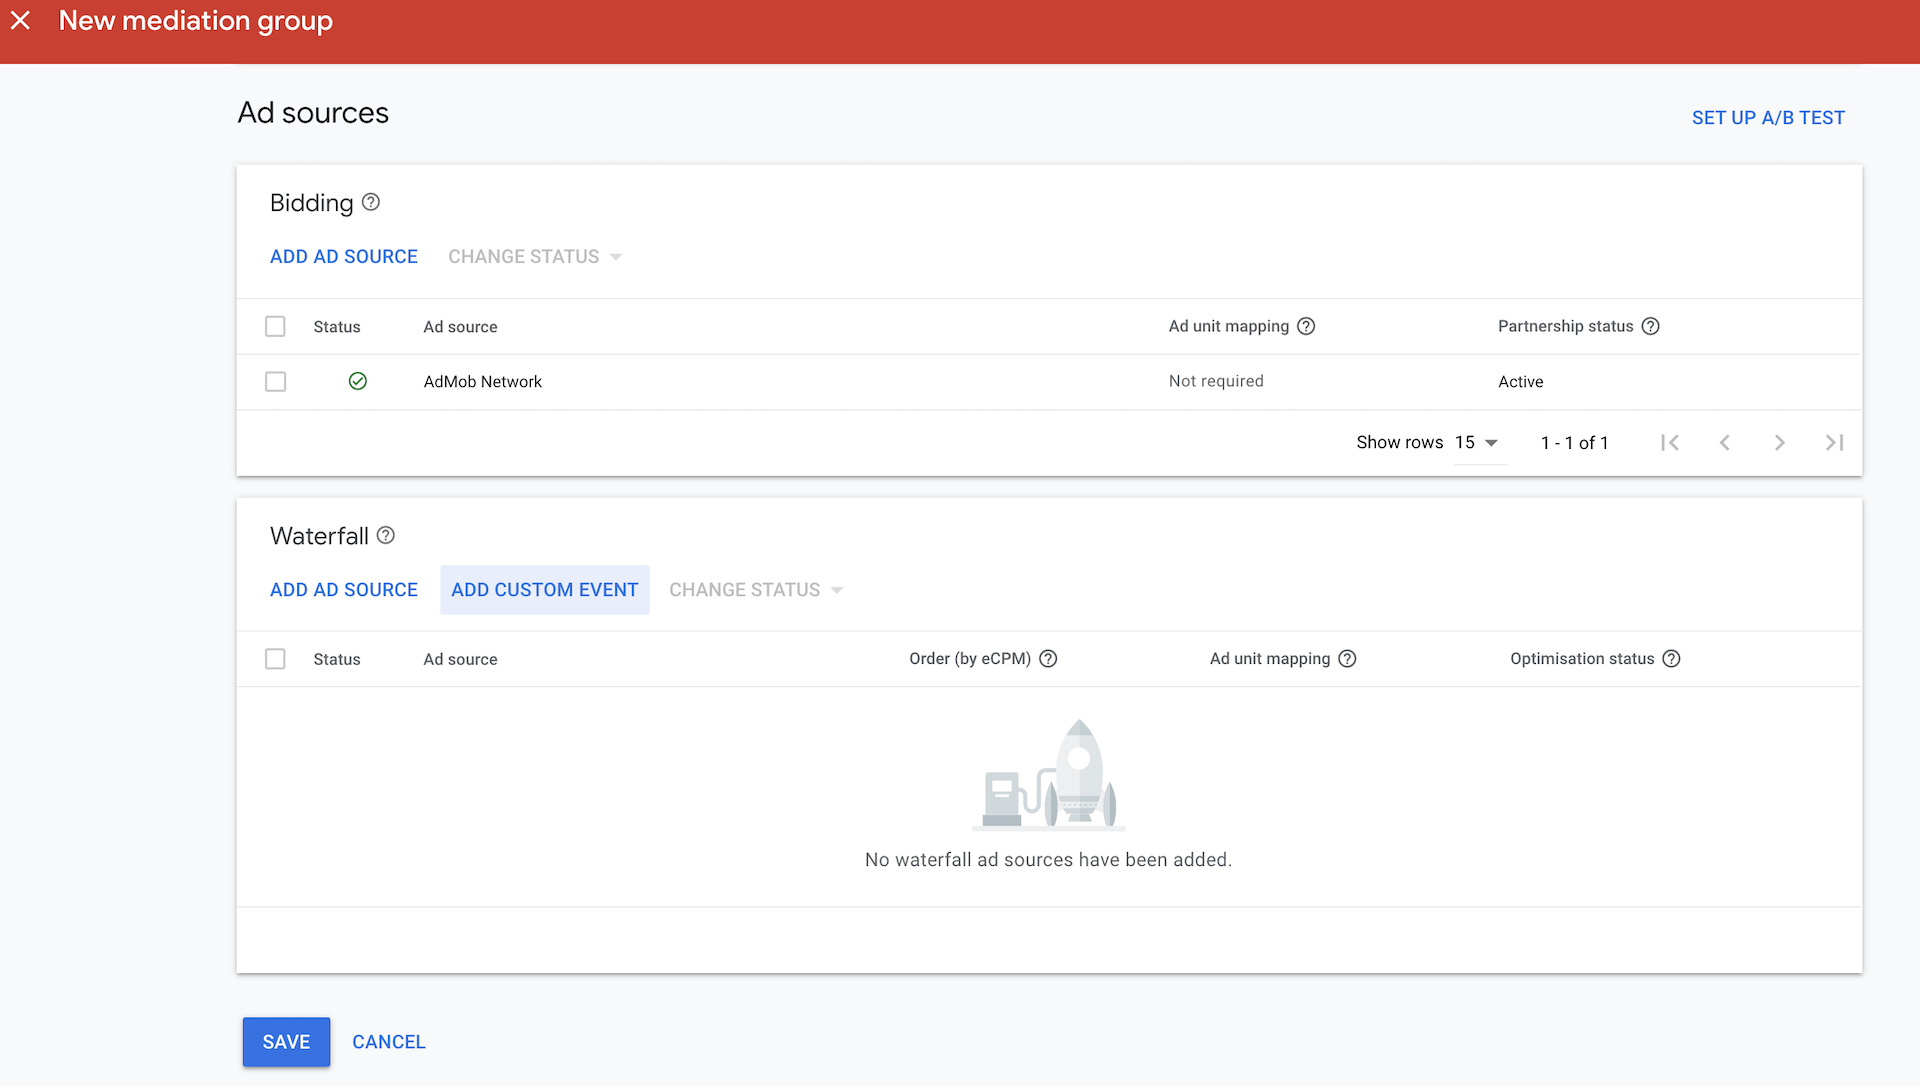
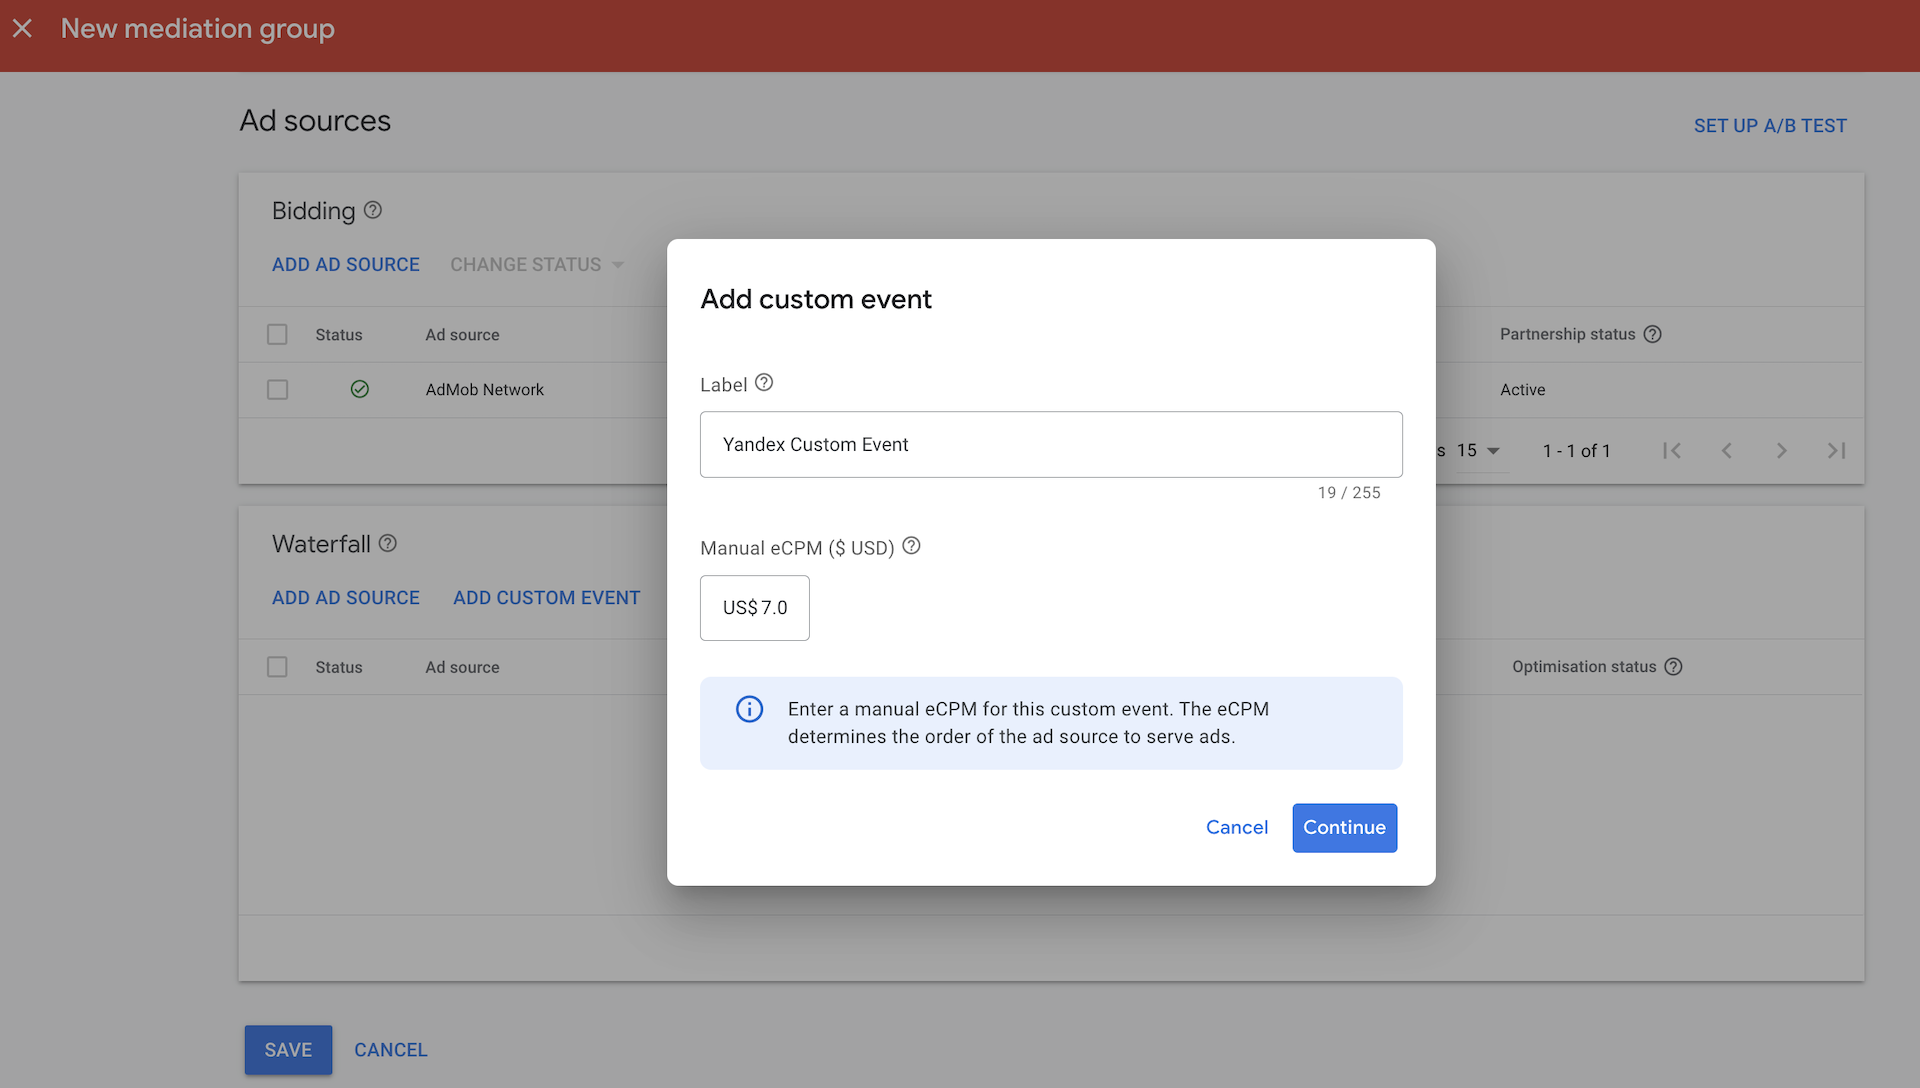
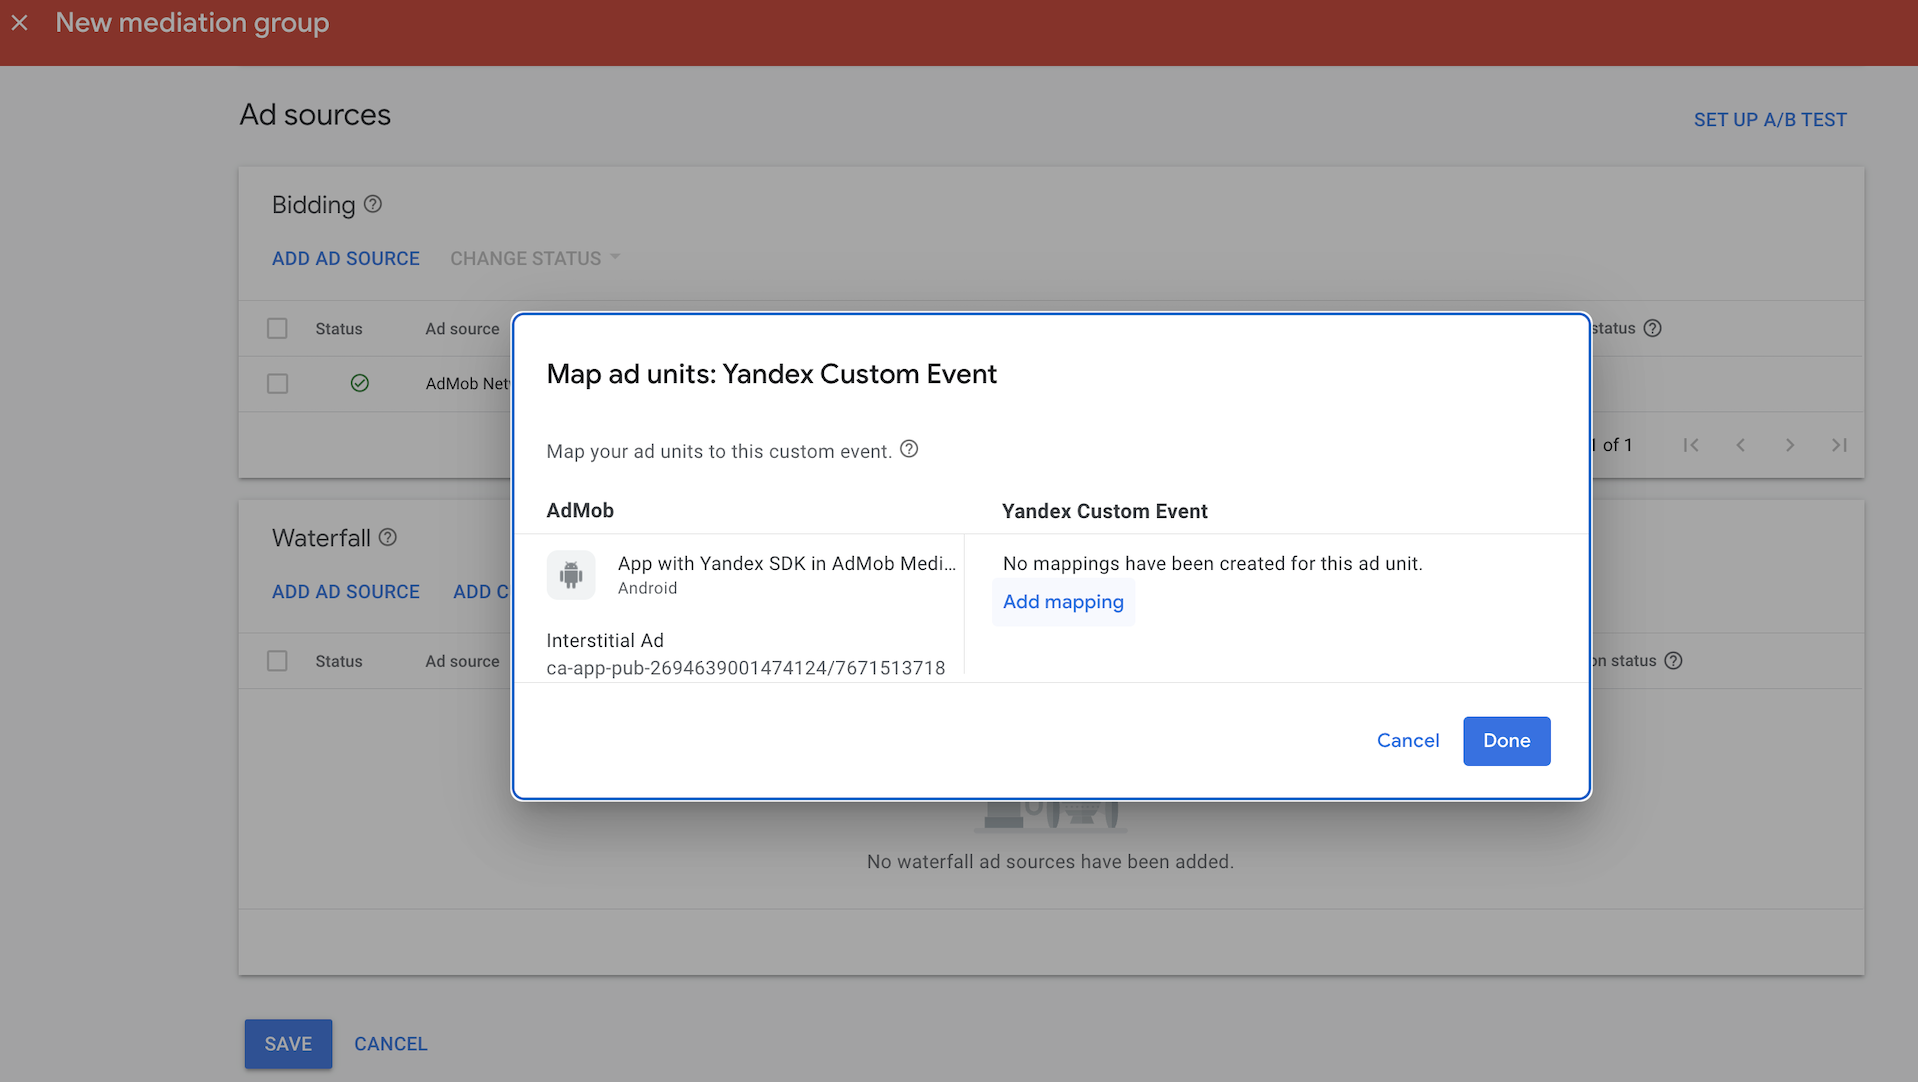
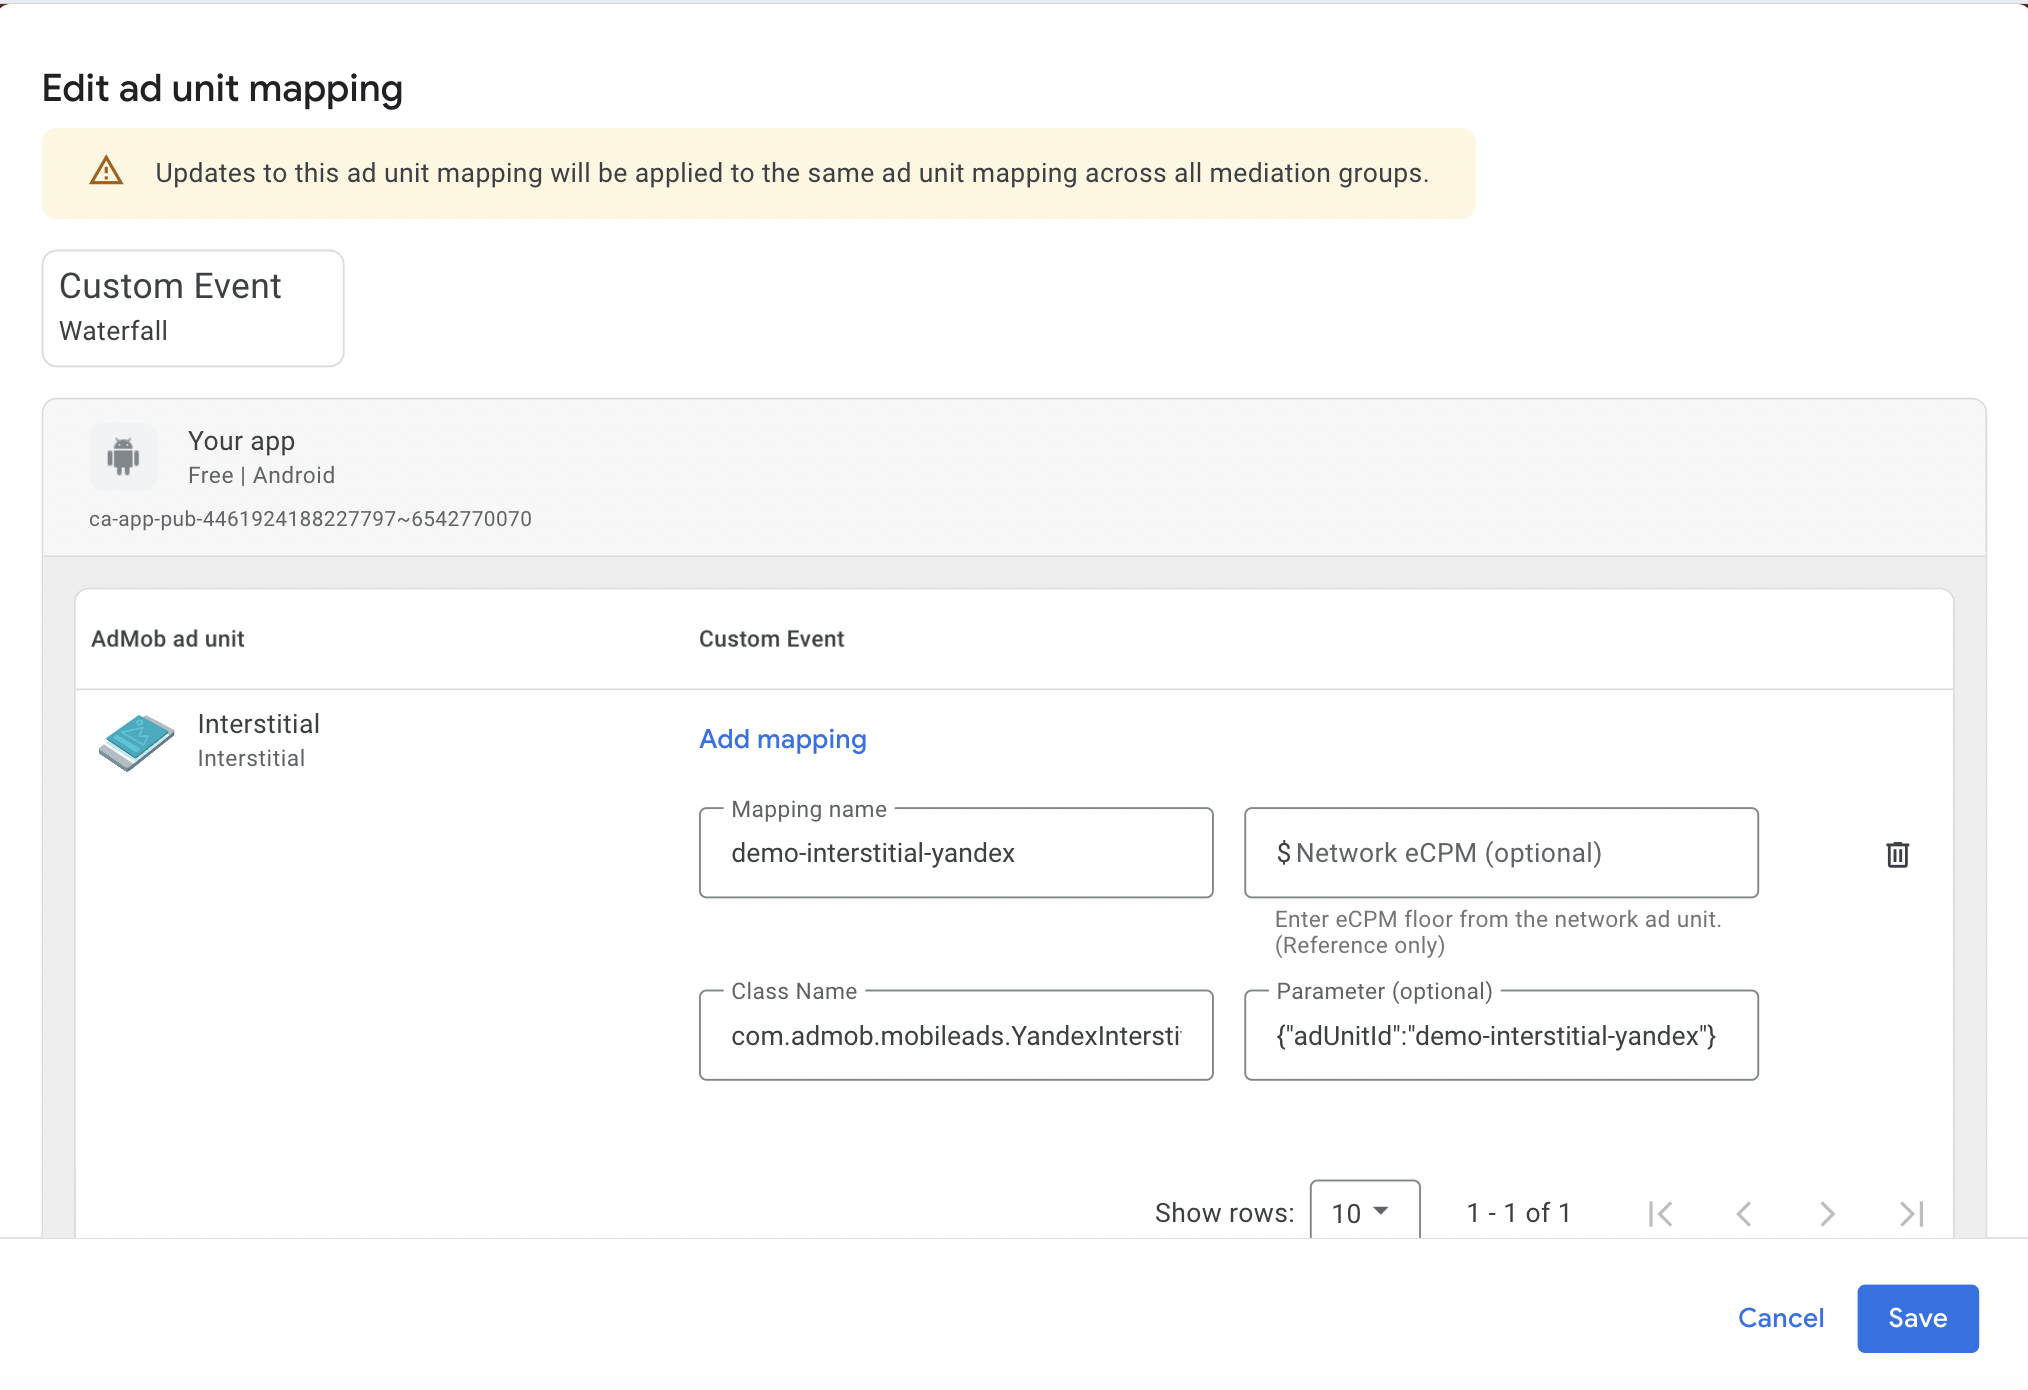
4. Test the integration
Before you publish your app, make sure you've set up the custom event correctly:
- Check that you entered the adapter class name exactly as shown in Step 7.
- Make sure your custom event parameter uses the correct JSON format:
{"adUnitId": "R-M-XXXXXX-X"}. - Test the integration using demo ad units or test placements.
- Check your app logs and the Debug Panel for any adapter initialization or ad loading errors.